Redshift
This guide explains how to create a read-only service account (metadata access only) for Revefi on Redshift.
Create user and group
As a super user, execute the following SQL commands to create a user and permissions to access a system table that has statistics about table storage (e.g. row count)
Please note:
- Make sure to generate a secure password for the field called <strong_password_for_revefi_metadata_only_access> and store it securely — you'll save it into Revefi later.
- We recommend using Redshift’s Query Editor V2 interface to run the snippet. Please copy the code and make any necessary modifications before running it.
-- Create Revefi's user and grant unrestricted SYSLOG ACCESS
CREATE USER revefi_user_metadata_access PASSWORD '\<strong_password_for_revefi_metadata_only_access>' SYSLOG ACCESS UNRESTRICTED;

-- Create group for user
CREATE GROUP revefi_group_metadata_access;
ALTER GROUP revefi_group_metadata_access ADD USER revefi_user_metadata_access;
Optionally, but highly recommended, assign this newly created user group to a low priority WLM queue.
Grant access to system tables
Then, grant SELECT access to all system tables in the PG_CATALOG schema:
GRANT SELECT ON ALL TABLES IN SCHEMA "pg_catalog" TO GROUP revefi_group_metadata_access;
Grant permissions to tables in schema(s)
For each schema, execute the following queries to grant metadata-only access. Note: remember to replace the <schema_name> and <database_name> below with the desired schema name.
-- Grant usage & references on all tables in schema
GRANT USAGE ON SCHEMA "<schema_name>" TO GROUP revefi_group_metadata_access;
GRANT REFERENCES ON ALL TABLES IN SCHEMA "<schema_name>" TO GROUP revefi_group_metadata_access;
ALTER DEFAULT PRIVILEGES IN SCHEMA "<schema_name>" GRANT REFERENCES ON TABLES TO GROUP revefi_group_metadata_access;
To programmatically generate the queries above for all schemas in a database, use the following command. Note: you still must execute these commands for the privileges to be granted.
SELECT
    'GRANT USAGE ON SCHEMA "' || schema_name || '" TO GROUP revefi_group_metadata_access;' || '\\n' ||
    'GRANT REFERENCES ON ALL TABLES IN SCHEMA "' || schema_name || '" TO GROUP revefi_group_metadata_access;' || '\\n' ||
    'ALTER DEFAULT PRIVILEGES IN SCHEMA "' || schema_name || '" GRANT REFERENCES ON TABLES TO GROUP revefi_group_metadata_access;' AS single_schema_statement
FROM svv_all_schemas
WHERE schema_name not in ('information_schema', 'pg_catalog', 'pg_internal')
AND database_name='<database_name>';
Establish Network Connectivity
Choose between 2 options for establishing network connectivity:
Option A: Configuring Redshift Interface-Type PrivateLink
Option B: Whitelist Revefi IP Address
Option A: Configuring Redshift Interface-type PrivateLink
To configure Redshift Interface-type PrivateLink, you need to provision certain AWS resources, if not already done. Creating an Interface VPC PrivateLink connection involves creating several AWS resources in the Redshift cluster account, such as:
- security group
- target group
- network load balancer
- VPC endpoint service
If you are connecting to an existing Redshift cluster, the security group likely already exists, but you may need to modify the security group rules to allow traffic from the Network Load Balancer (NLB) created for this endpoint service.
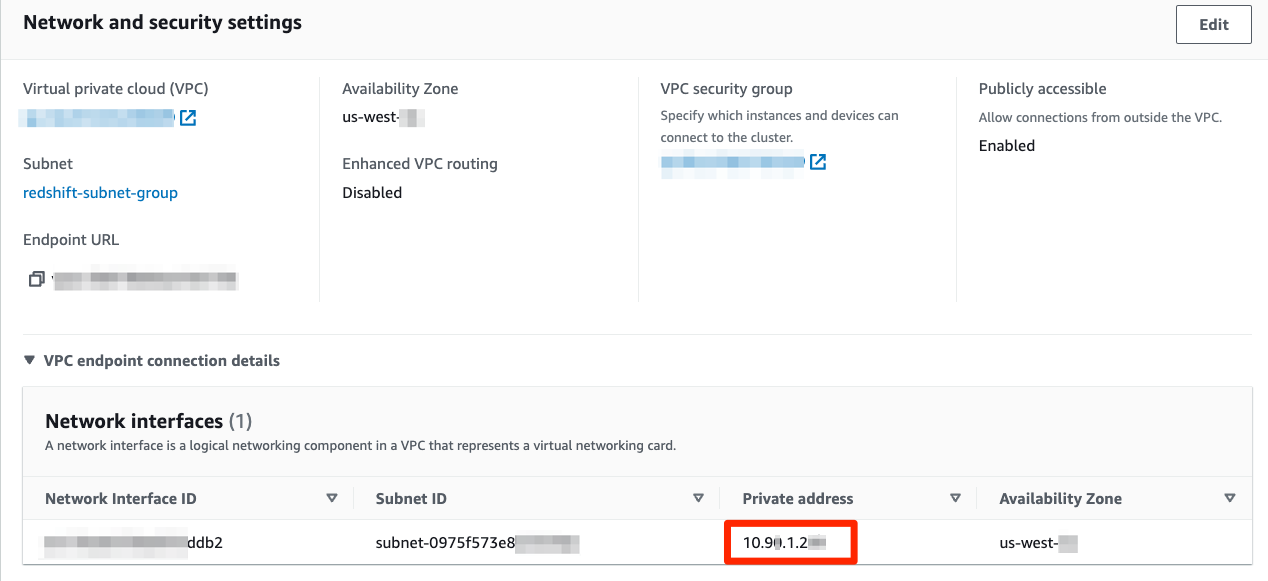
The target group will be attached to the NLB to direct requests. Use IP addresses from the Redshift cluster’s Network Interfaces as Target IPs, not the ones listed in the Node IP addresses section, which can change. TCP should be the target group protocol.
Target type: IP address
When creating the NLB, you need to create a listener that attaches to the newly created Target Group for port 5439.
Once the VPC Endpoint Service is provisioned, you can find the service name in the AWS console by navigating to VPC → Endpoint Services and selecting the appropriate endpoint service. Obtain the service name field value and include it in your communication to the Revefi team.
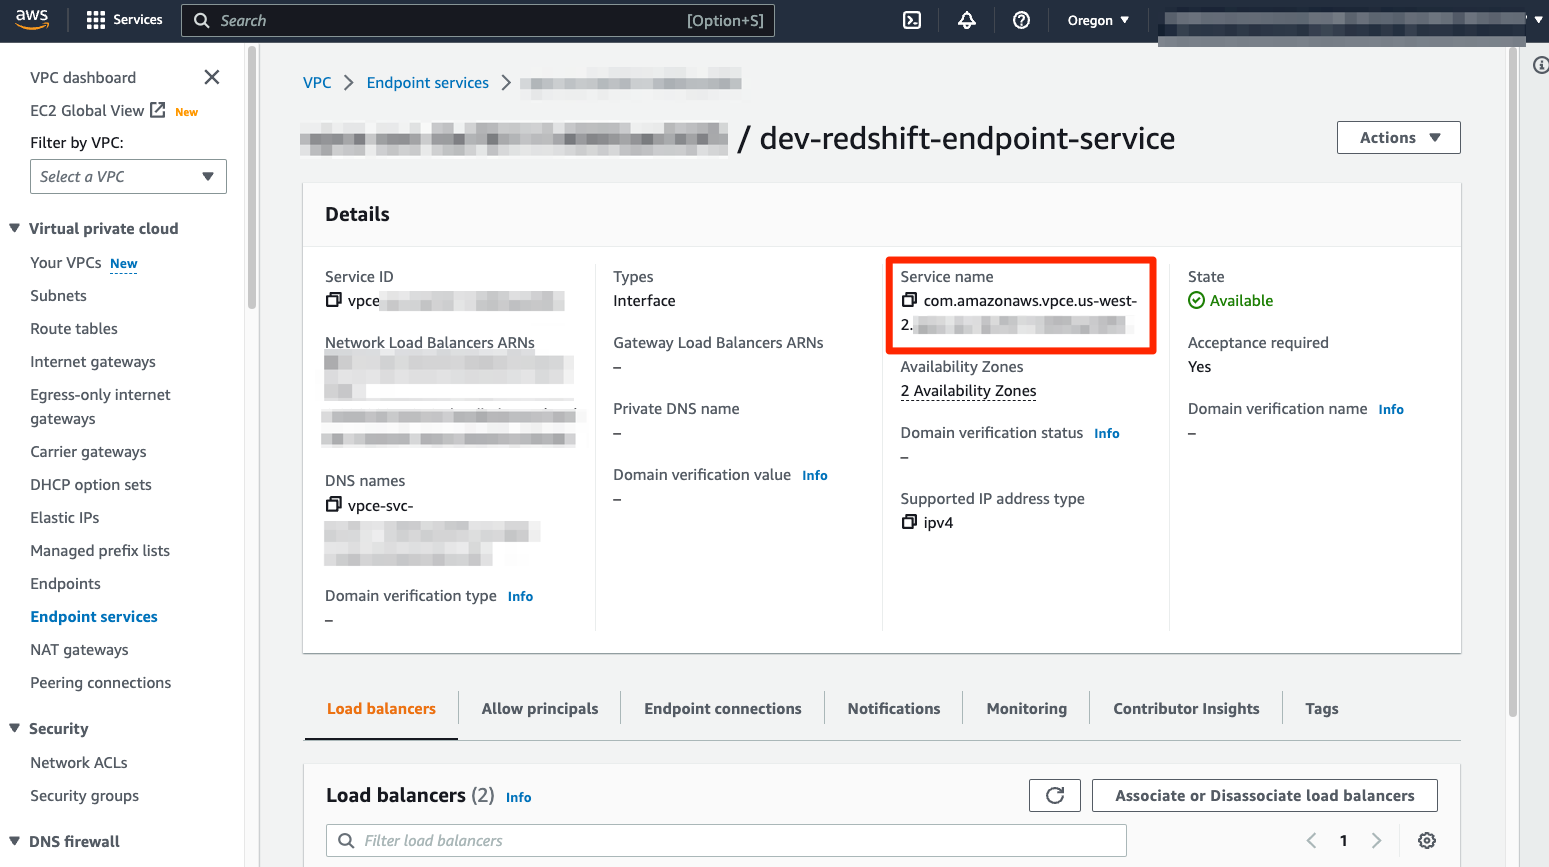
Get service name field value
To grant Revefi AWS account access to the VPC Endpoint Service, click the Allow principals tab on the provisioned VPC endpoint service, then click Allow principals and enter the ARN of the root user as arn:aws:iam::220294960462:root in the appropriate production AWS account.
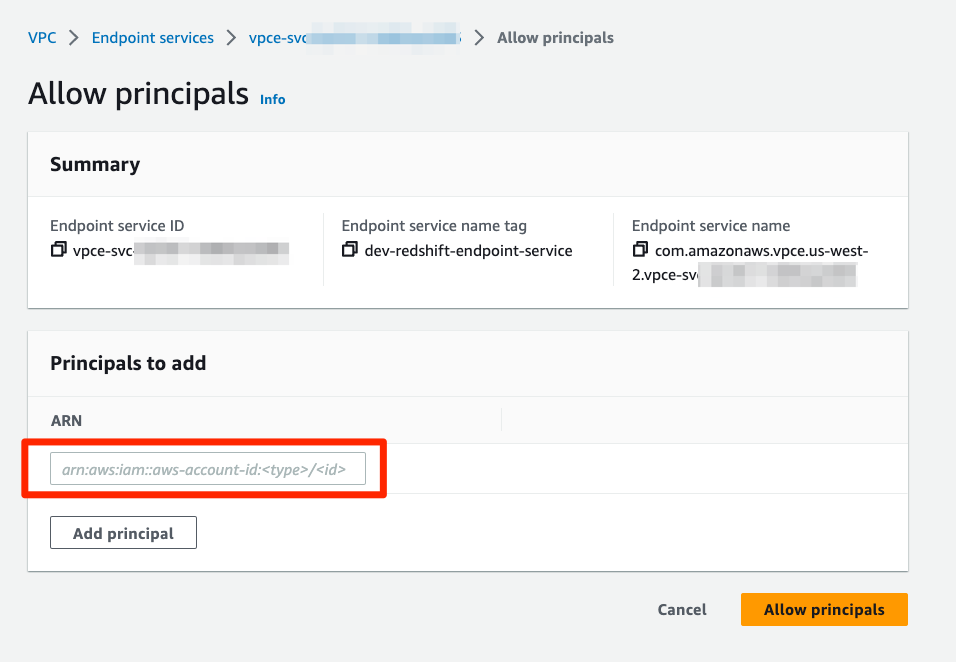
Enter ARN
Finally, add the necessary information to the following template and provide it to the Revefi team. Once Revefi receives this information, they will work with you to complete the PrivateLink setup.
VPC Endpoint Service Name:
Redshift cluster AWS Region (e.g., us-east-1, eu-west-2):
Redshift cluster AWS Availability Zone (e.g., us-east-1a, us-east-1b, us-east-1c):
Option B: Allowlist Revefi IP Addresses
If your Redshift cluster is configured to only allow connections from an “allowed list” of IP addresses, add Revefi’s IP addresses to the allowed list.
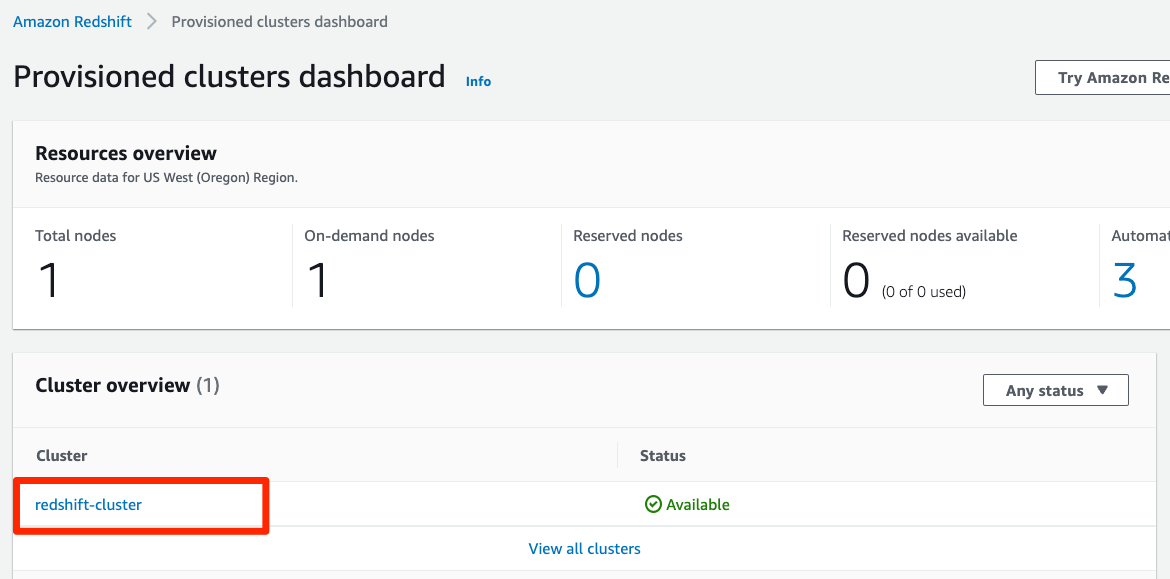
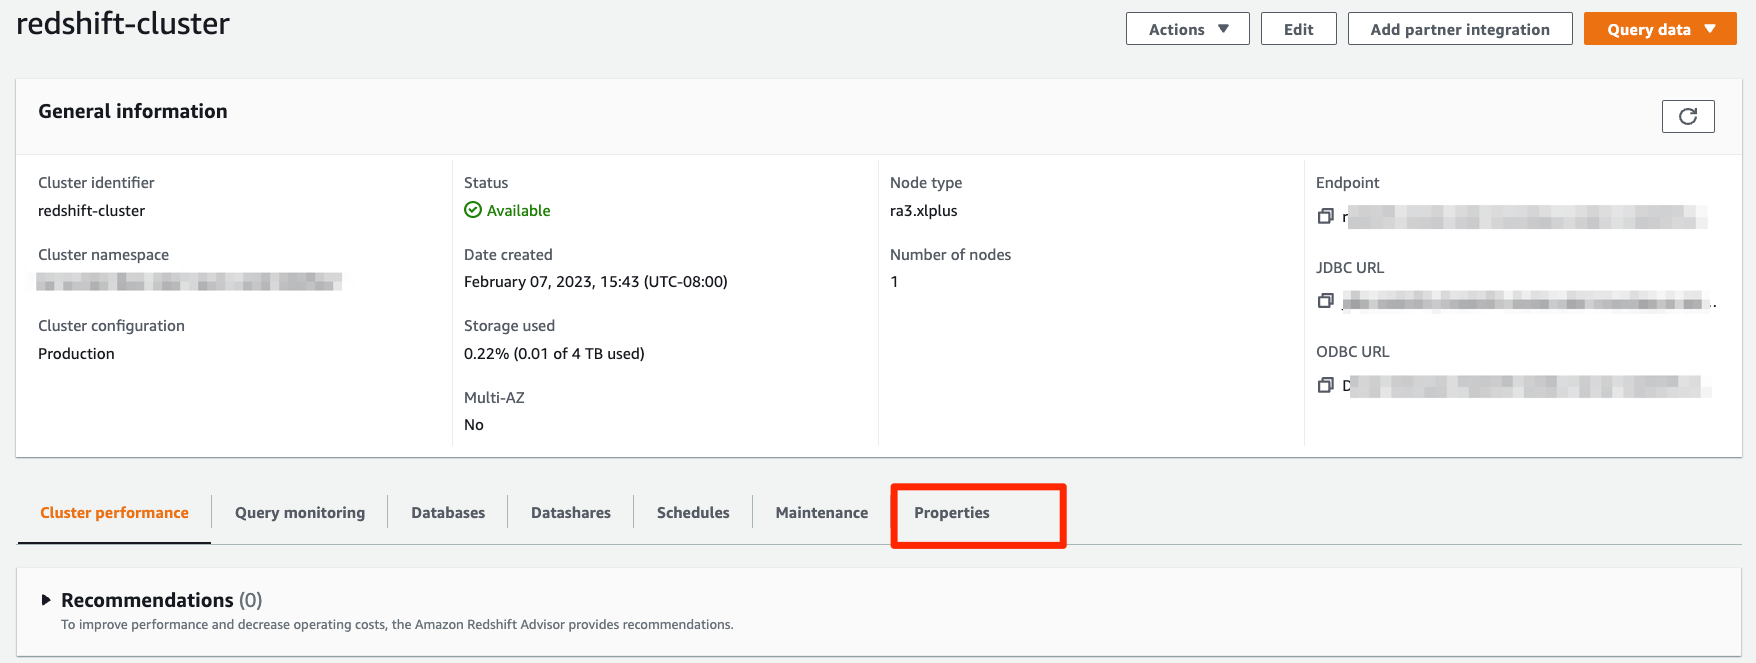
- Navigate to the AWS Console and select Amazon Redshift. In the Redshift dashboard, click on the desired cluster name.
- Click on the Properties tab under General information.
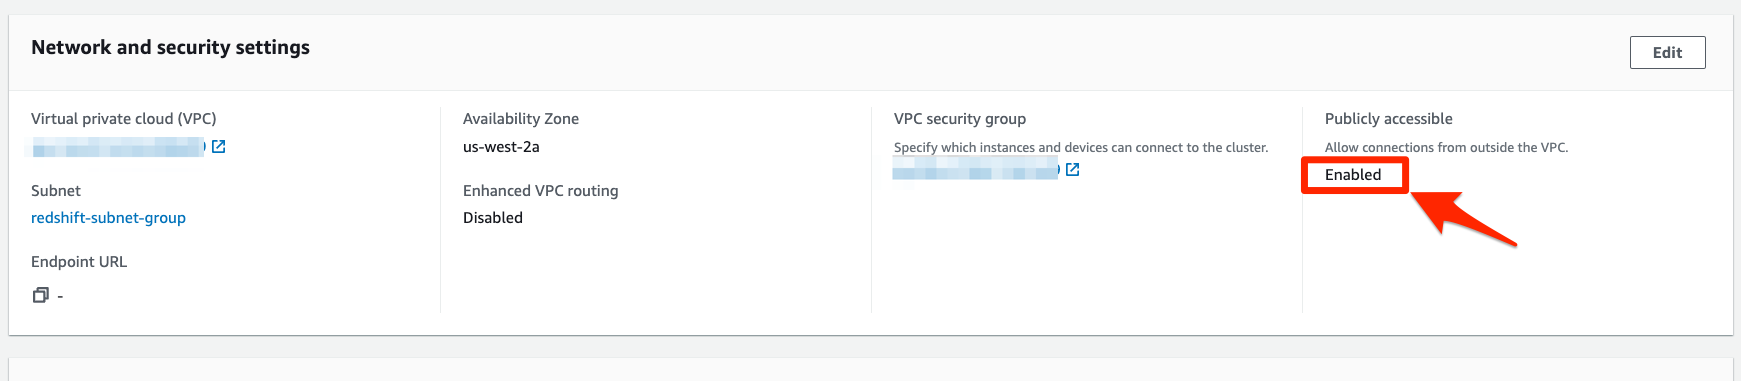
- Navigate to the Network and security settings section. If Public Accessibility is not already enabled, click on the Edit publicly accessible button and then enable. Click on Save Changes.
- Click on the VPC security group link (sg-XXXXXXXXXXXXXX).
- On the Security Groups page, click on Edit inbound rules.
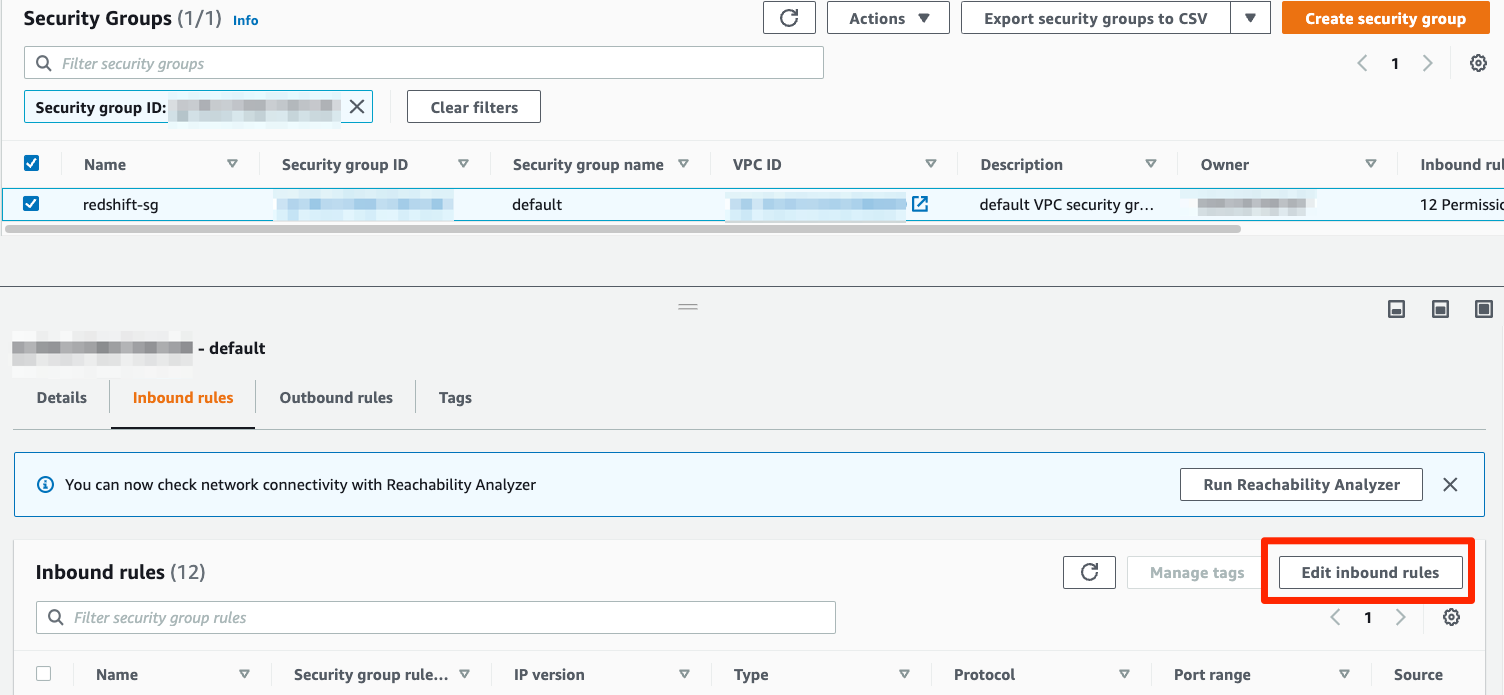
- Add Revefi’s IP addresses 44.225.56.55, 44.227.173.42, and 52.10.141.35 of type Redshift as an additional rule and save changes.
Additional Considerations
Add Revefi User Group to a low/lowest priority WLM queue:
-
Create a low/lowest priority queue in Automatic WLM: Query priority - Amazon Redshift
-
Add Revefi user group
revefi_group_metadata_accessto the above queue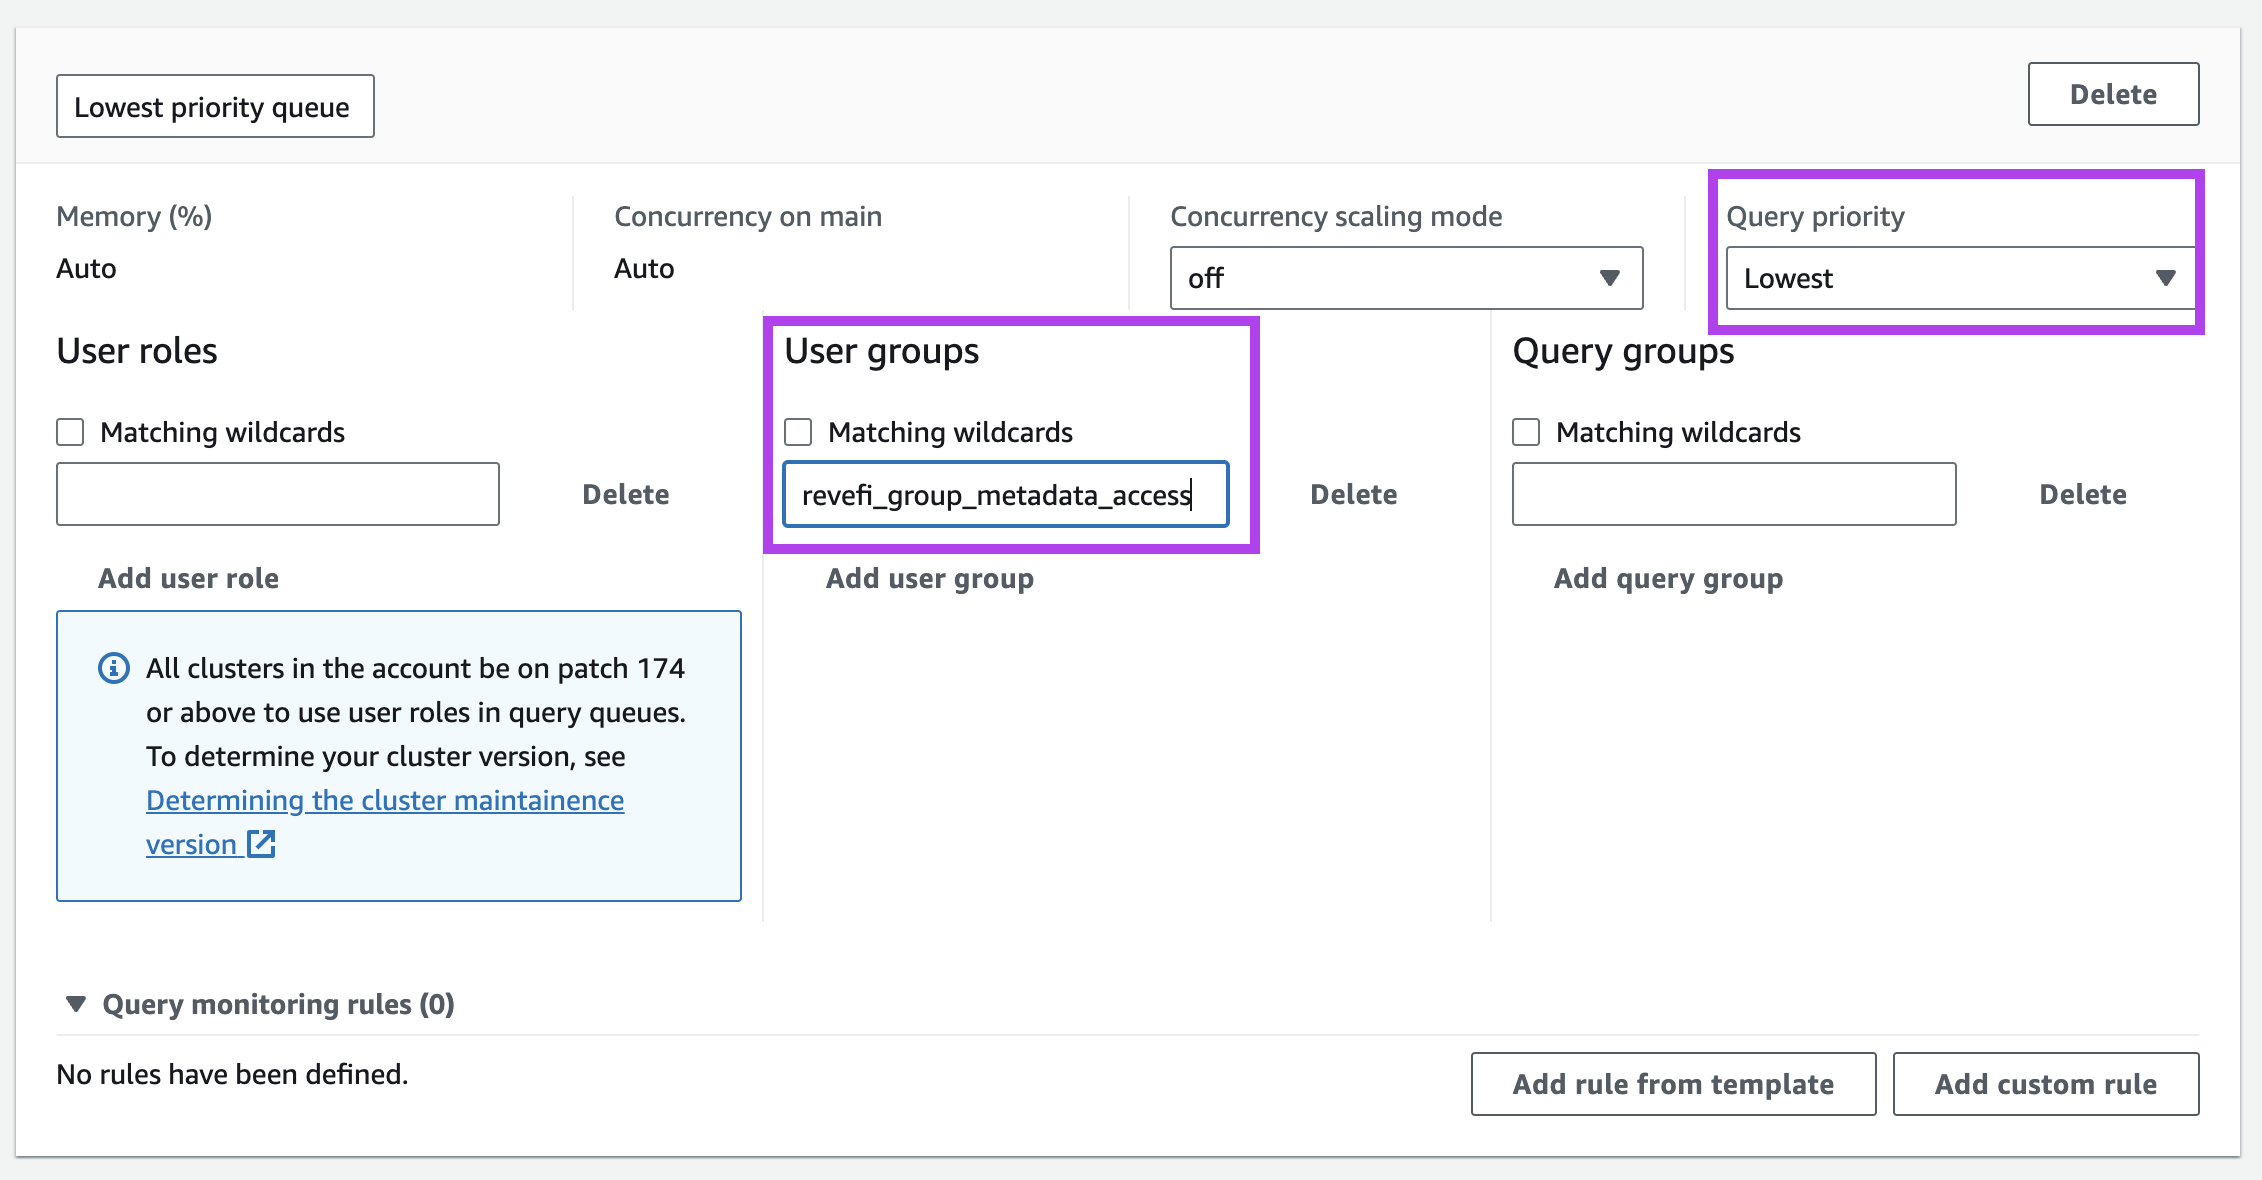
Steps to create low/lowest priority queue in Automatic WLM:
- Sign in to the AWS Management Console.
- Open the Amazon Redshift console.
- In the navigation pane, choose Configurations.
- Choose Workload management.
- Choose the parameter group that you want to modify.
- Choose the Workload management tab to view the current WLM configuration.
- Choose Edit workload queues to edit the WLM configuration.
- Choose Add queue to add additional workload queues. You can create up to eight queues for each workload, and associate queues with user groups or query groups.
- Set the priority of the queue to low/lowest.
- Add
revefi_group_metadata_accessto User groups - Choose Save.
Updated 2 months ago