Looker
Integrating Revefi with Looker enables seamless tracking of metadata and lineage of visualizations and looks.
Note: If you are not a Looker Admin, have your Looker admin follow the steps below to create the API credentials for you.
Step 1: Create a new permission set
Navigate to Roles and create a new permission set called Revefi Permission Set.
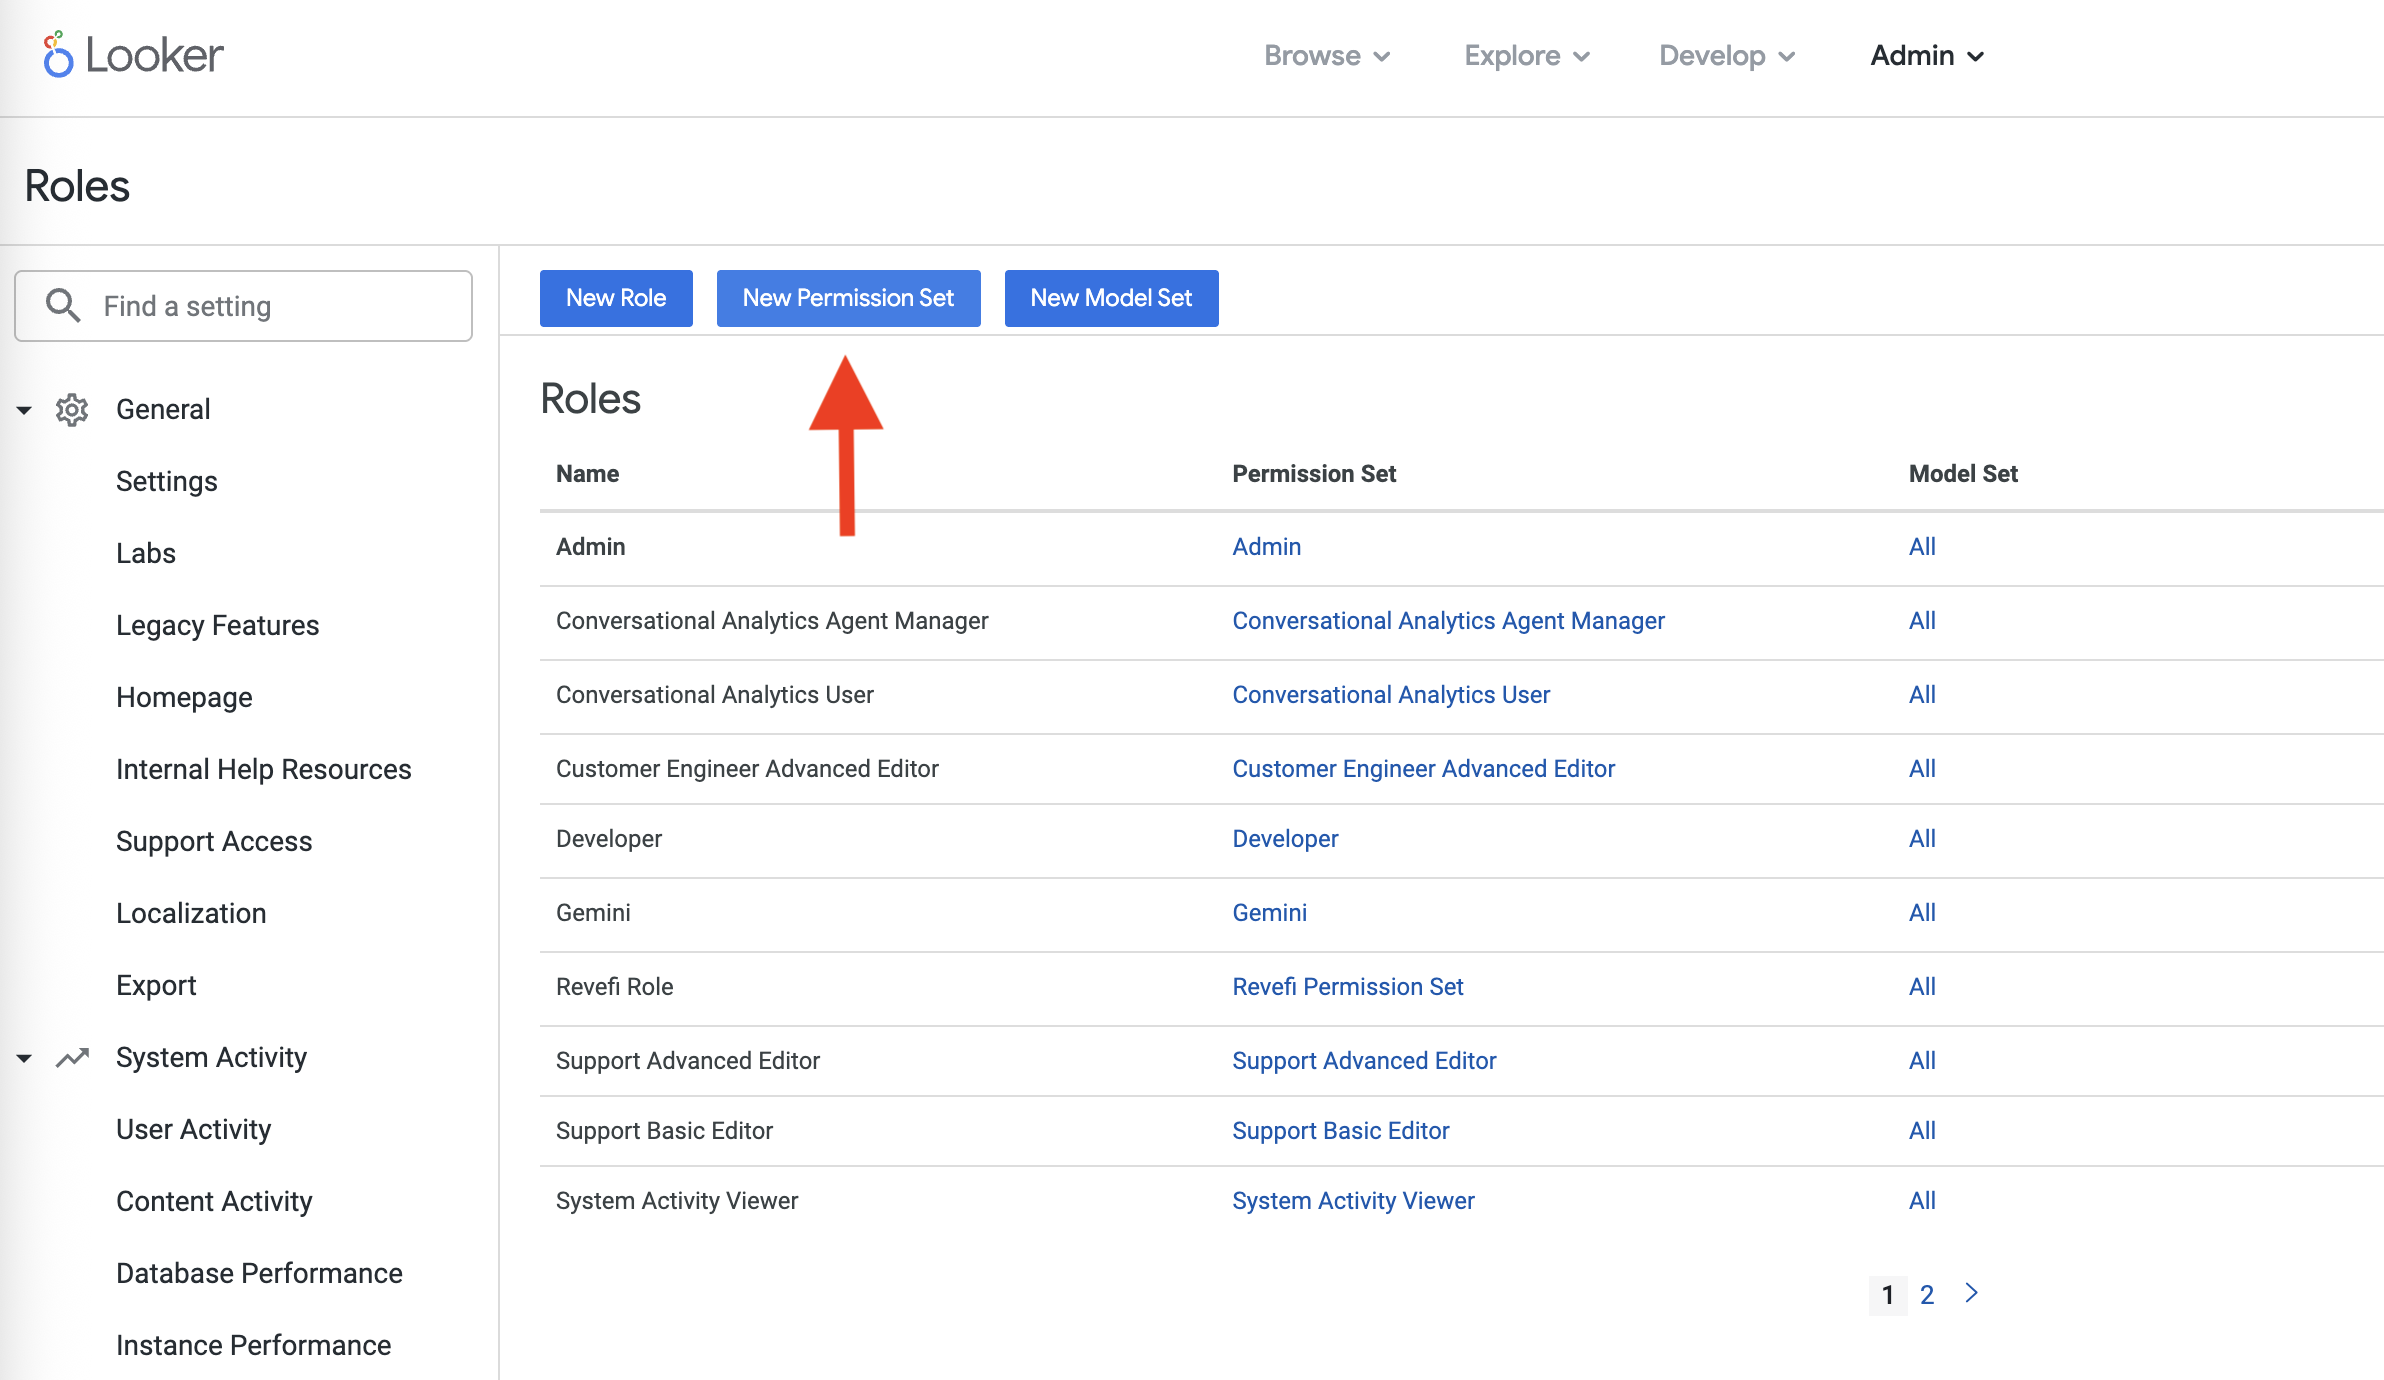
Select the following permissions (see more information in Looker docs and in the Permissions Wiki below).
access_data
   see_lookml_dashboards
   see_looks
     see_user_dashboards
     explore
     see_sql
     see_lookml
see_system_activity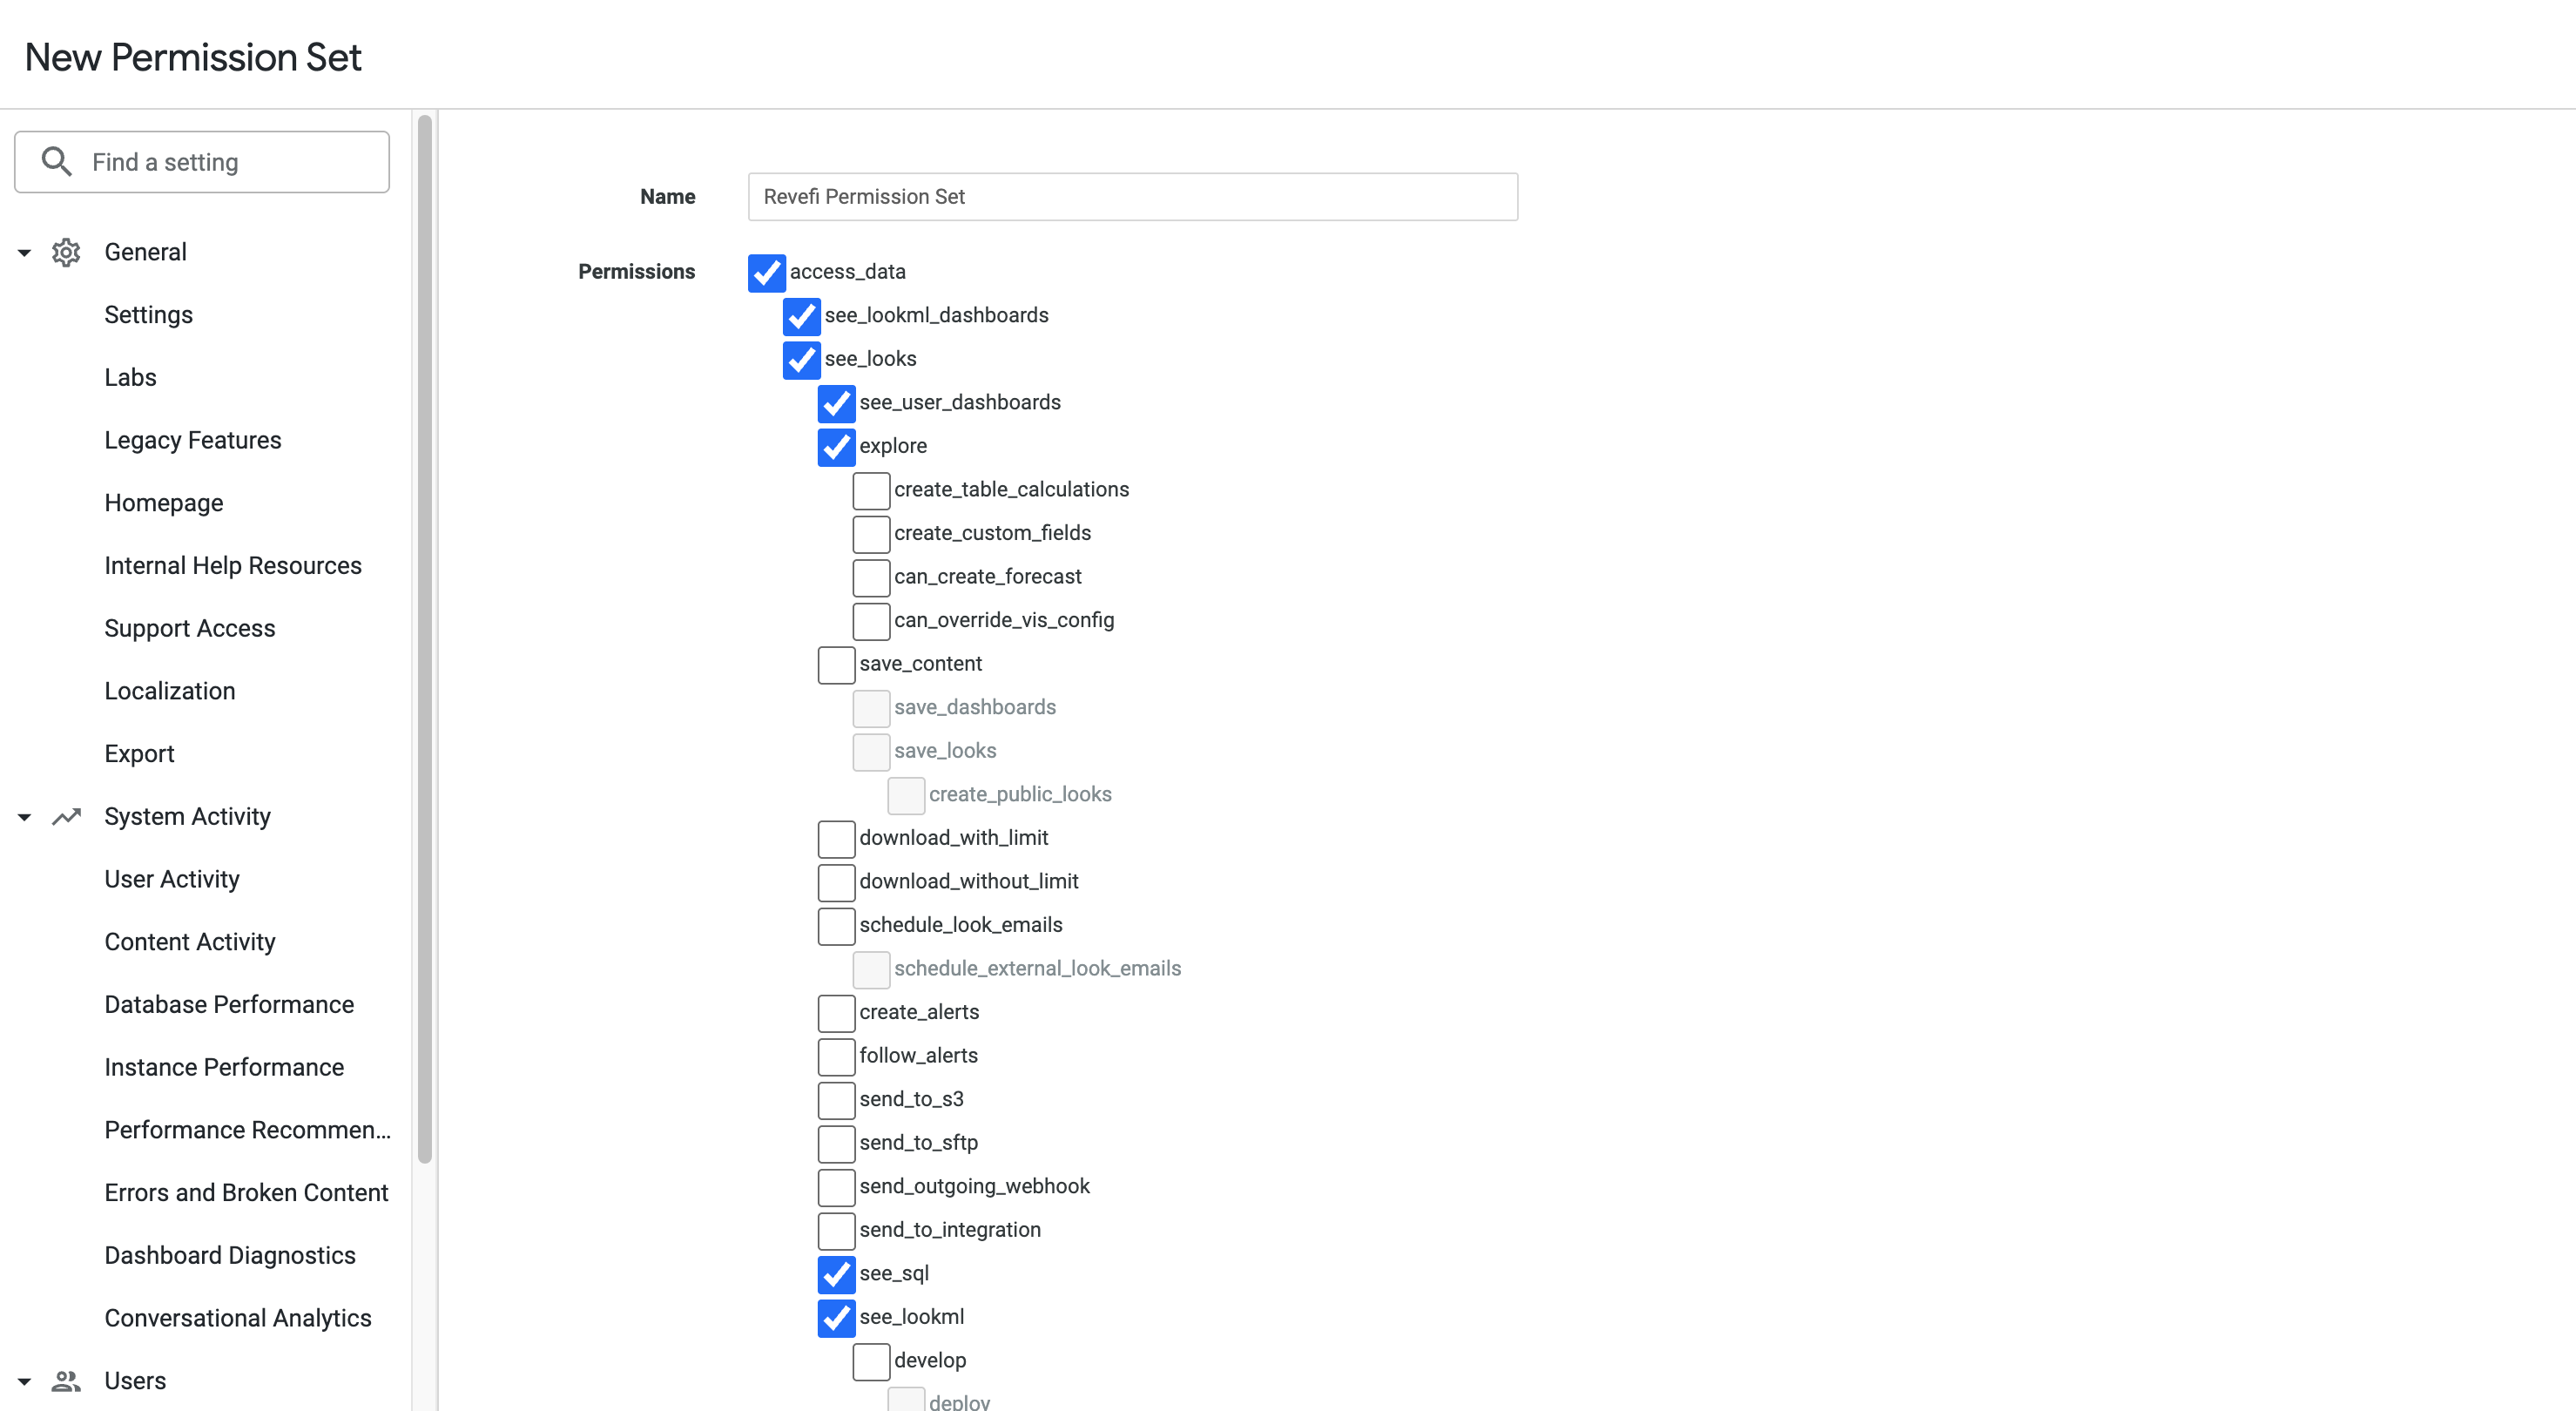
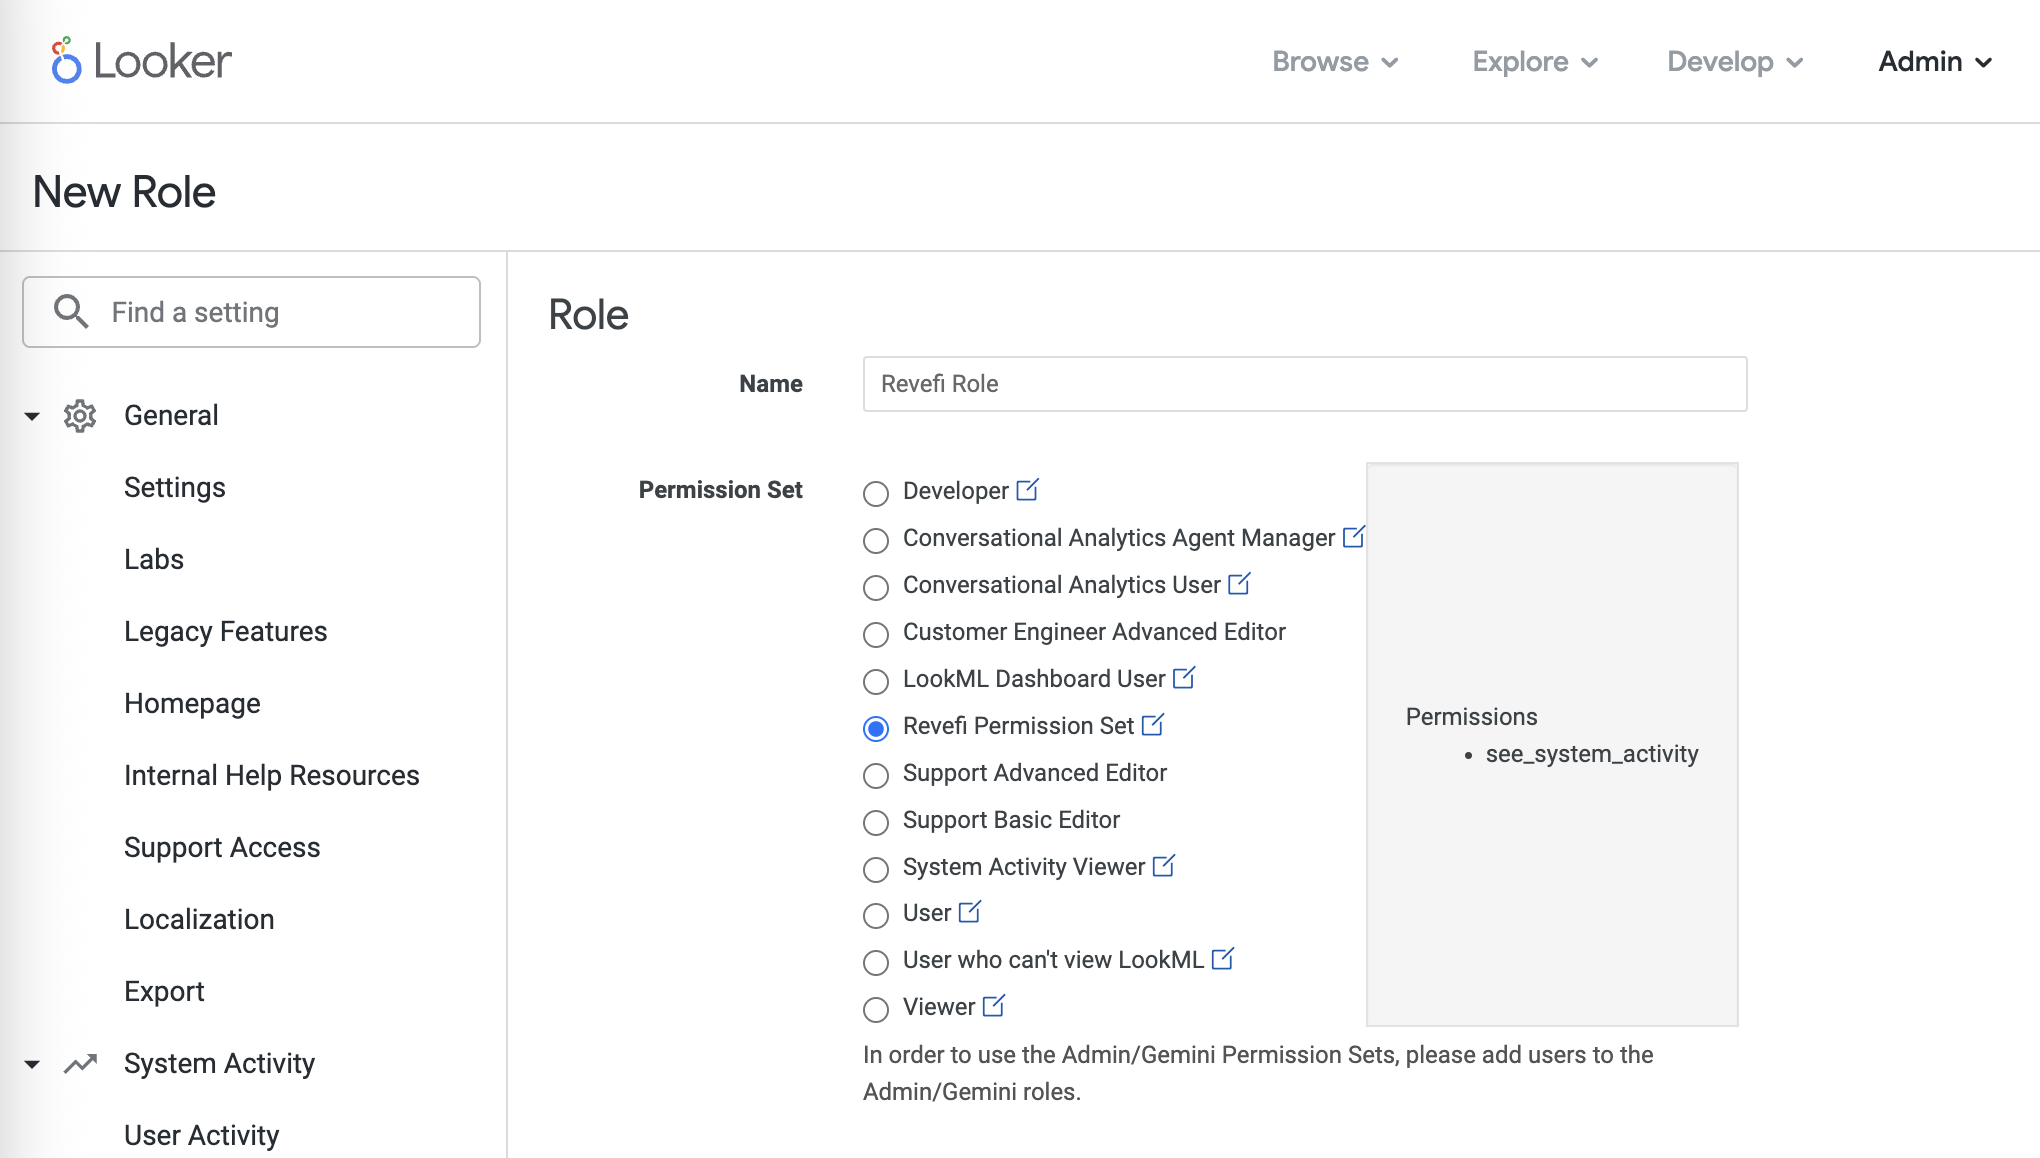
Step 2: Create a new role
Under Roles, create a new role called Revefi Role. Select the Revefi Permission Set.
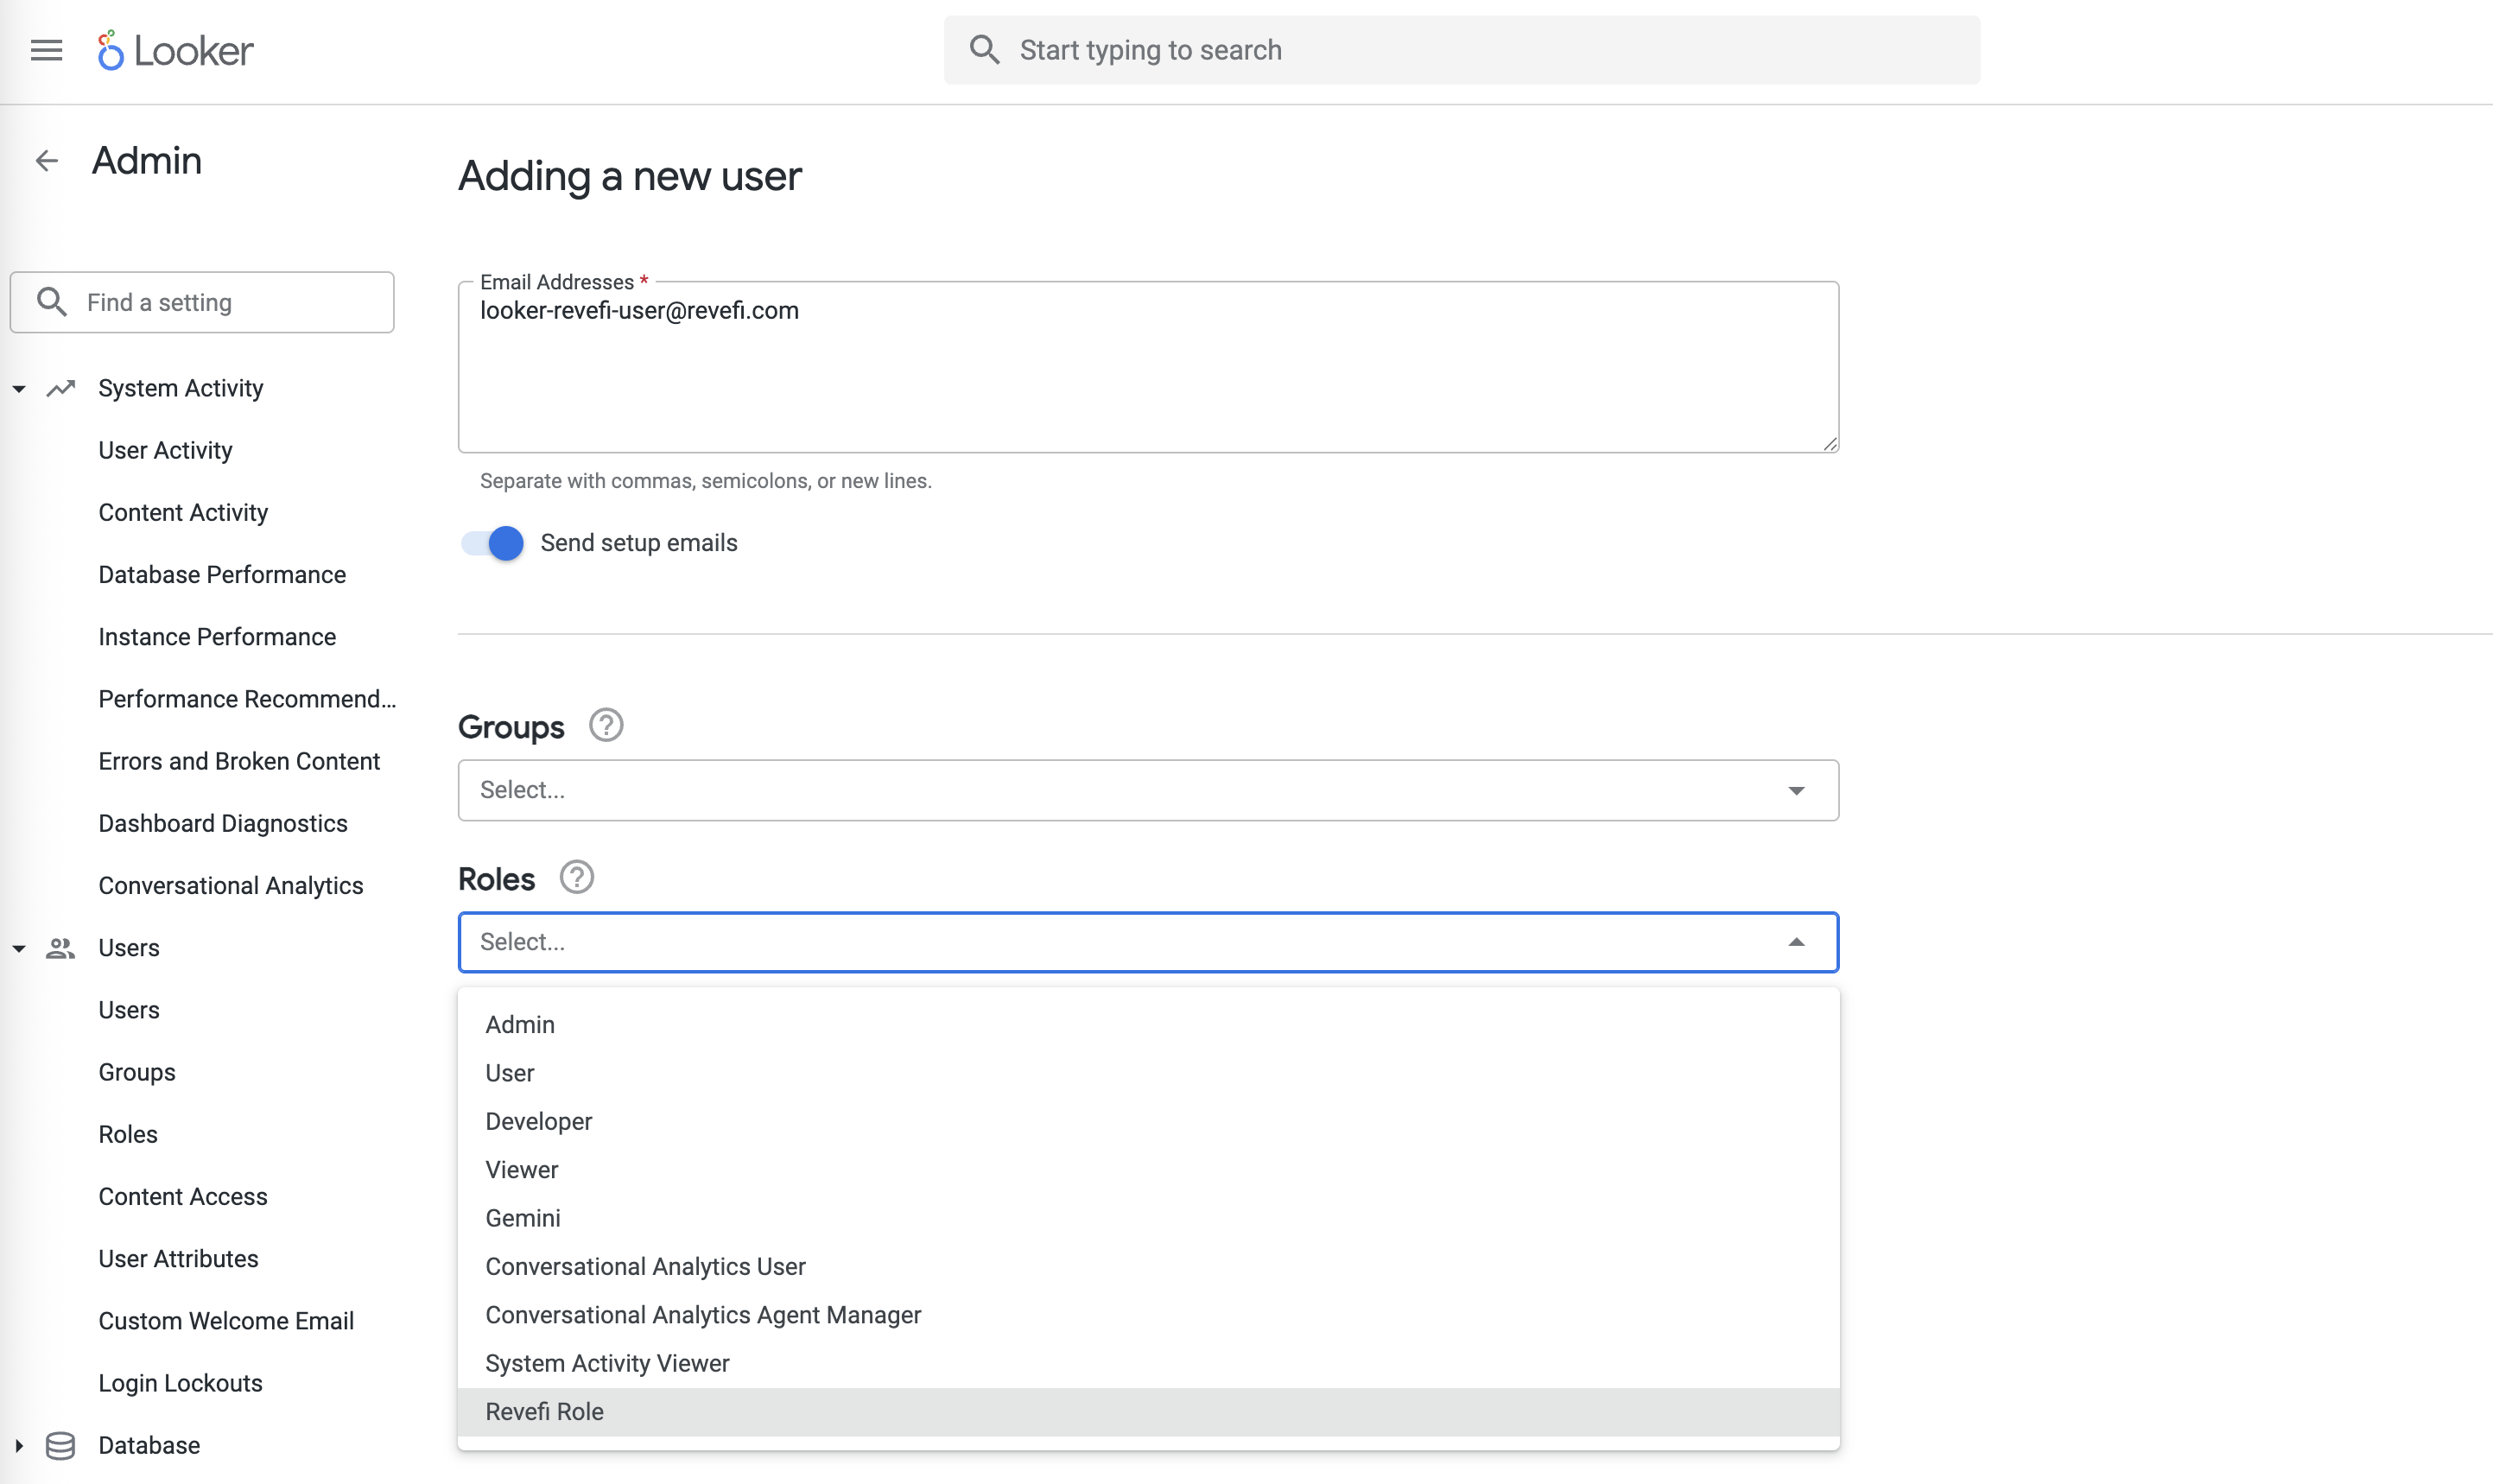
Step 3: Create a new user
Go to the Users page and create a new user called looker-revefi-user@<domain>.com.
Note: this email does not have to be valid.
In the Roles section, select Revefi Role to assign the role to the user.
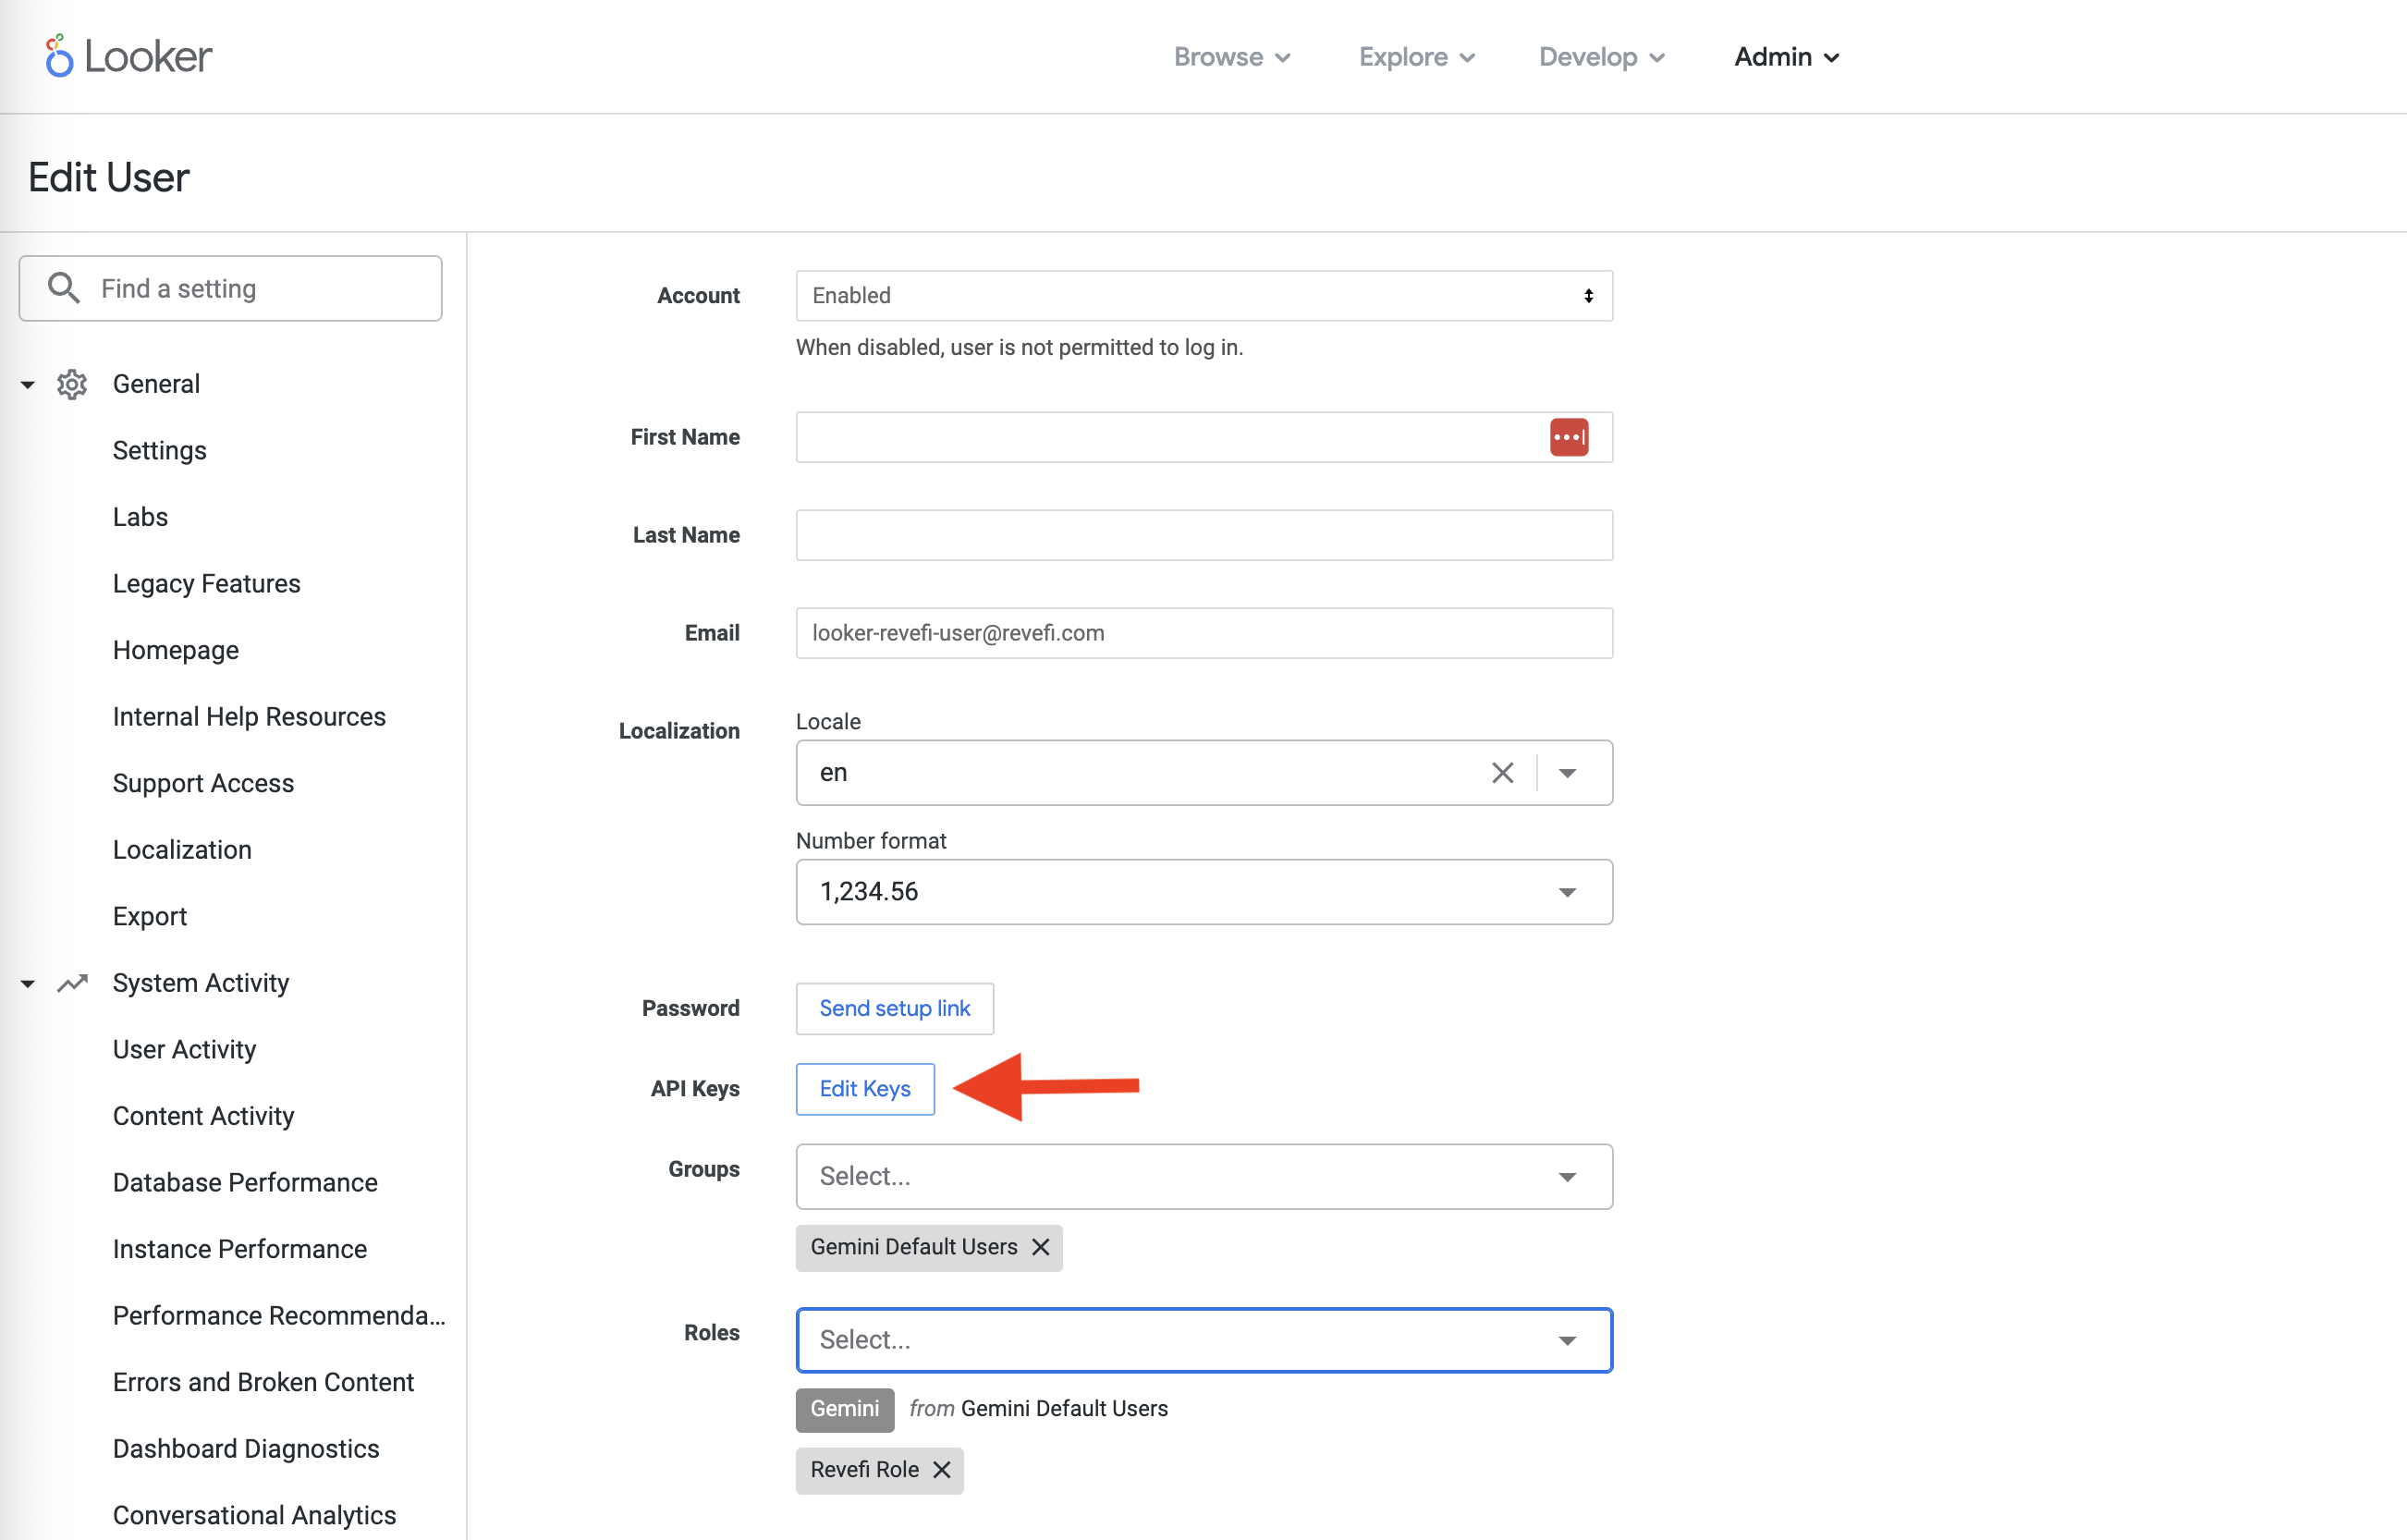
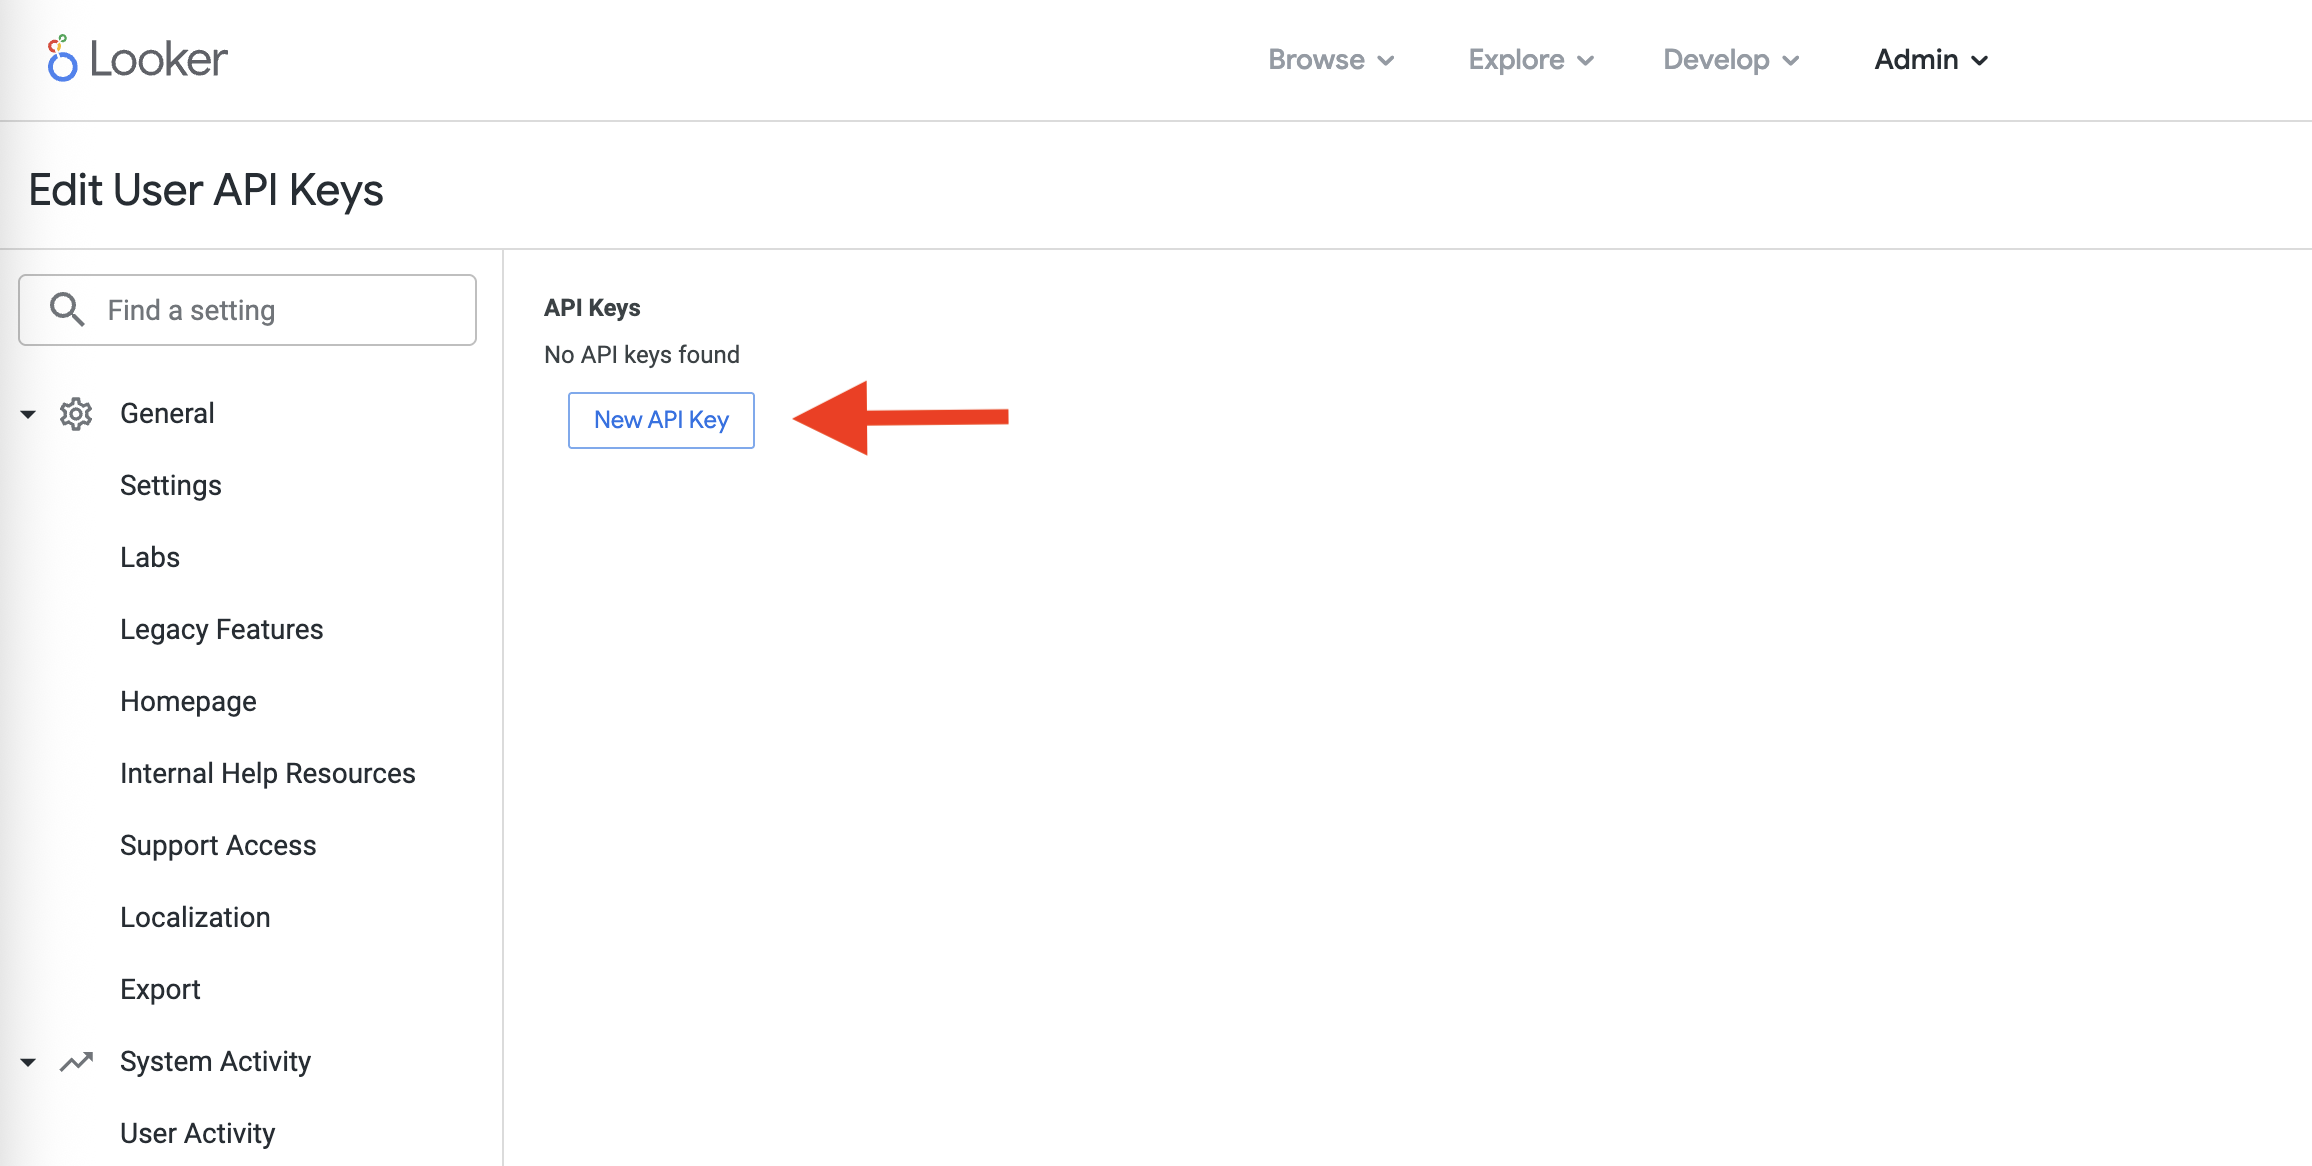
Step 4: Create API keys for the user
On the Users page, click on the Edit Keys button. The Edit User API Keys page opens and shows the existing API keys. Click the New API key button to generate a new key.
Note the client ID and client secret generated in this step.
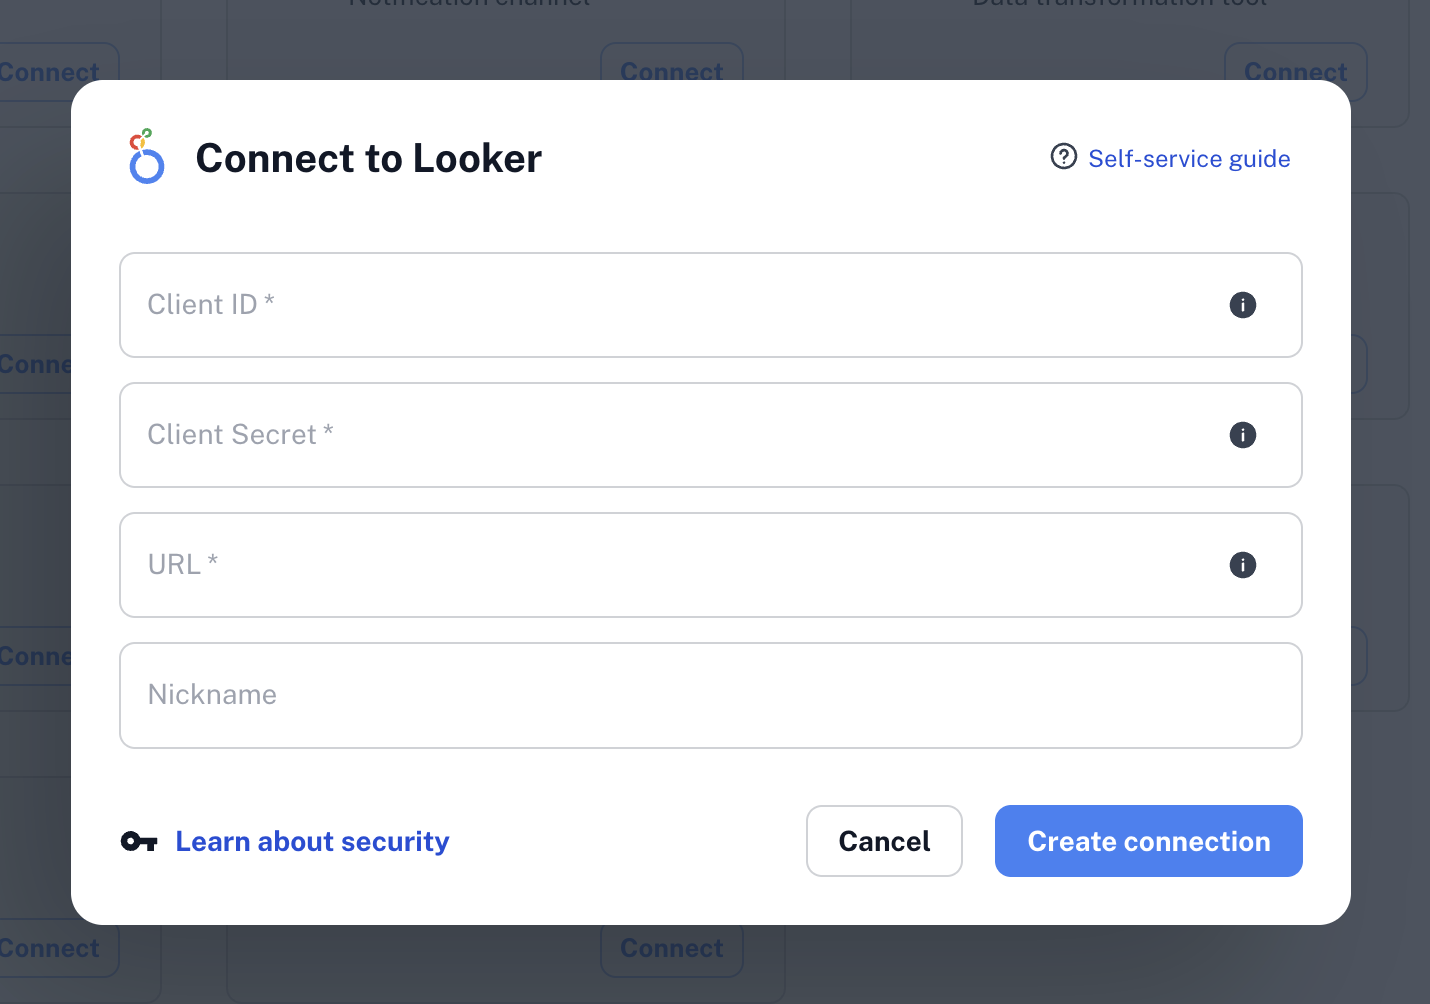
Step 5: Connect Looker to Revefi
The API credentials that you generated include a client ID and a client secret. You'll need to provide these to the Looker connection within Revefi along with the URL for your Looker instance via the Connections page in app.revefi.com:
Partial LineageYou may observe incomplete lineage representation within Revefi for Looker Persistent Derived Tables. To enable full lineage tracking for Persistent Derived Tables, please contact
.
Permissions Wiki
Below is a breakdown of each permission required by Revefi and why it's needed:
| Permission | Description | Why Revefi Needs It |
|---|---|---|
access_data | Base permission that grants the ability to access data within Looker. Required for all data-related permissions. | Enables Revefi to read metadata and build lineage from your Looker content. |
see_lookml_dashboards | Allows viewing dashboards defined in LookML projects. | Required to discover and track LookML-based dashboard definitions for lineage mapping. |
see_looks | Permits viewing of saved Looks (individual query visualizations). | Enables Revefi to catalog all Looks and trace their dependencies back to warehouse tables. |
see_user_dashboards | Allows viewing dashboards created by users in folders. | Required to discover user-created dashboards and include them in lineage tracking. |
explore | Grants access to explore data and understand query structures. | Allows Revefi to analyze Explore definitions and understand how data flows from models to visualizations, as well as parse un-published dashboards. |
see_sql | Permits viewing the underlying SQL generated by queries. | Essential for Revefi to build accurate lineage by parsing the SQL that connects Looker content to warehouse tables. |
see_lookml | Allows viewing of LookML code (models, views, explores). | Required for Revefi to parse LookML definitions and map relationships between views, models, and explores. |
see_system_activity | Provides access to Looker's System Activity logs and usage data. | Enables Revefi to understand content usage patterns and identify active vs. stale dashboards/Looks. |
Note: These permissions follow Looker's dependency hierarchy. For example,see_user_dashboardsrequiressee_looks, which in turn requiresaccess_data. See Looker's Roles Documentation for the full permission dependency tree.
Troubleshooting Issues
Updated 6 months ago
What’s Next
Once that is done, Revefi will get all definitions from Looker (models, explores, dashboards, looks, views and boards) and create lineage with your warehouse tables.
All your BI artifacts now have Revefi Monitoring enabled. You can easily see the health of a visualization by introspecting health of underlying tables.
From any of your warehouse tables, you can also use lineage to get to impacted Looker objects.