
ServiceNow
This integration enables Revefi users to effortlessly generate incidents in ServiceNow using OAuth 2.0 or Basic authentication.
Pre-requisites
- You will need admin access to your ServiceNow instance.
- The Event Management Connectors App (
sn_em_connector) must be installed on your ServiceNow instance. - Depending on your authentication method:
- OAuth 2.0: Ensure you have the necessary permissions to create OAuth API endpoints.
- Basic Authentication: Create users and assign them roles.
- You will need your ServiceNow instance ID (e.g.,
dev12345indev12345.service-now.com).
Recommendation: We recommend using OAuth 2.0 authentication. It provides stronger security through token-based access, eliminates the need to share user credentials, and offers better auditability and access control compared to Basic Authentication.
Authentication Methods
Configure your ServiceNow integration using either OAuth 2.0 or Basic Authentication.
Configure an OAuth 2.0 API Endpoint for External Clients in ServiceNow
-
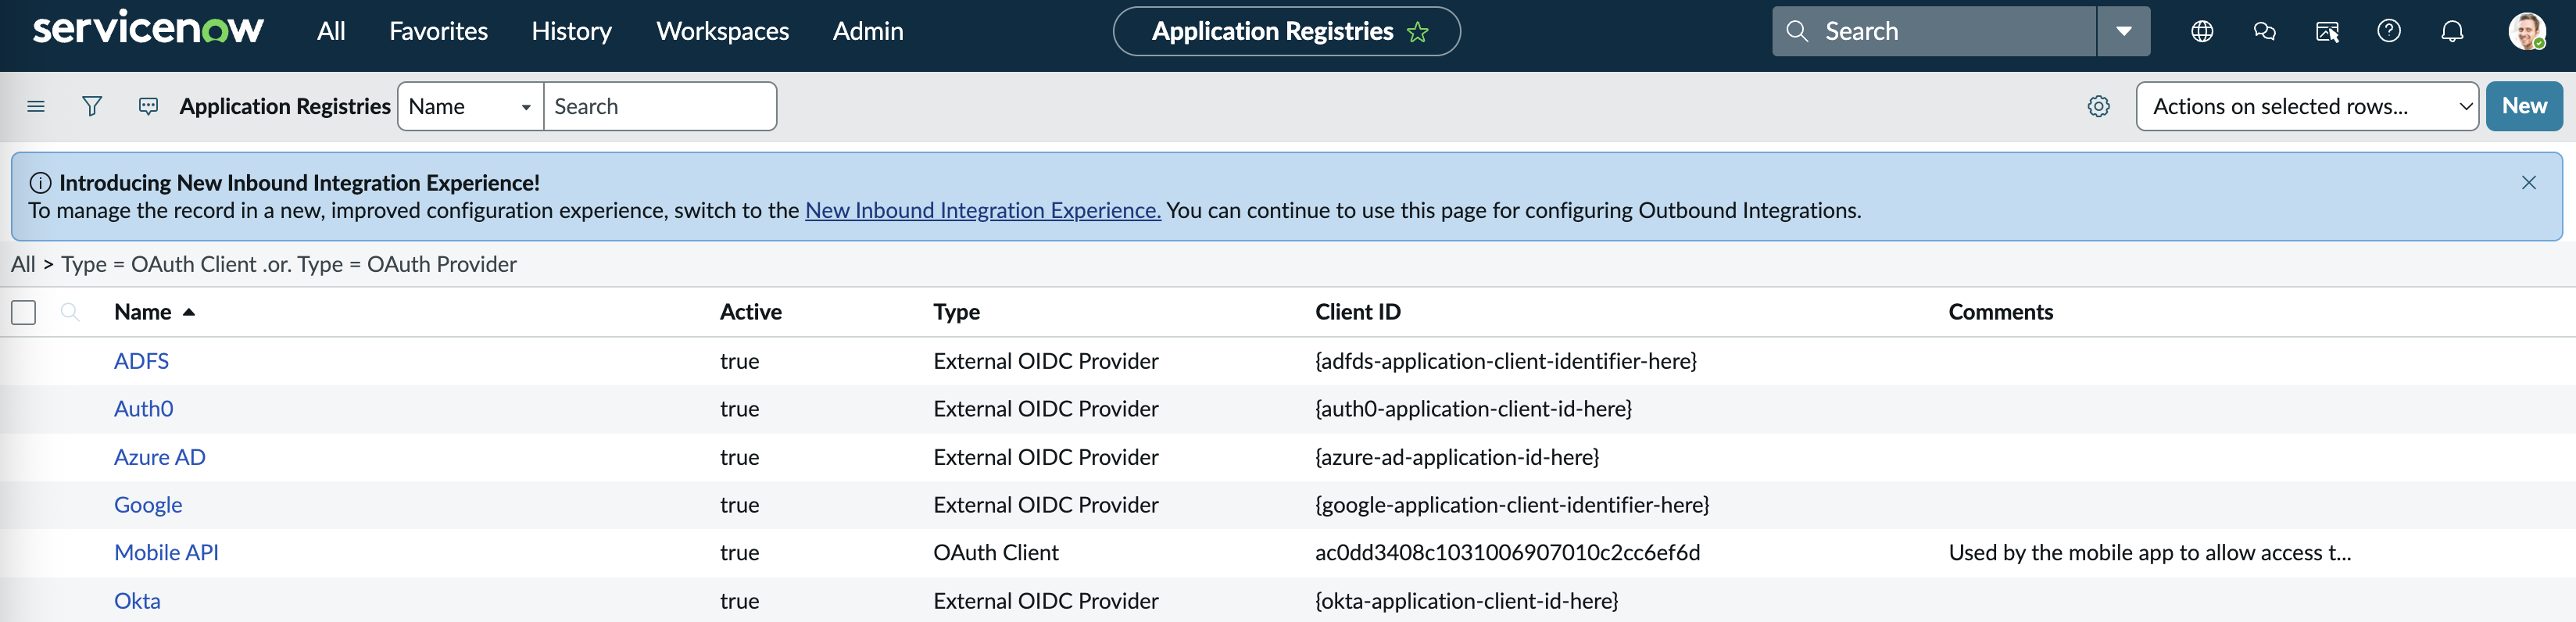
Navigate to your ServiceNow instance and navigate to 'Application Registry' using the search bar
-
Click on the 'New' button to create a new application
-
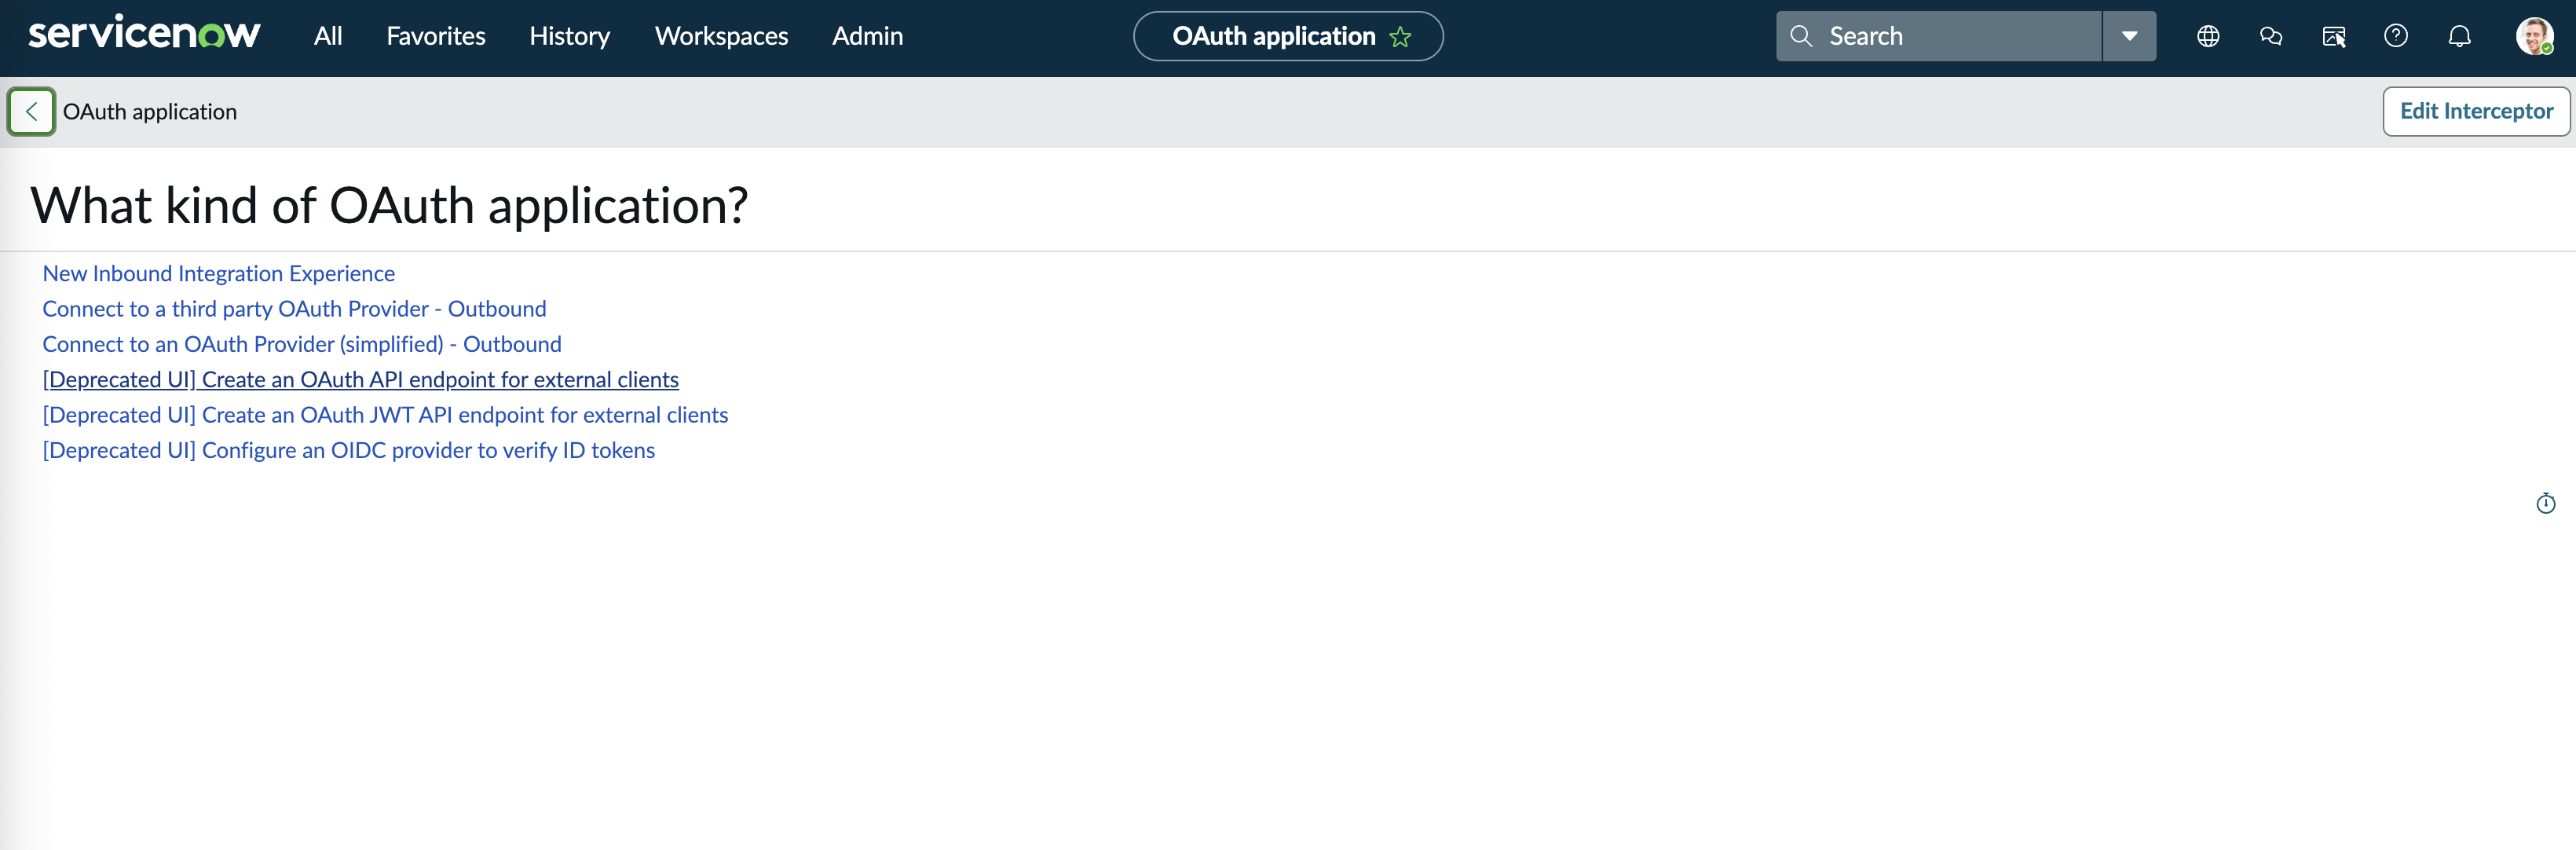
Select 'Create an OAuth API endpoint for external clients'
-
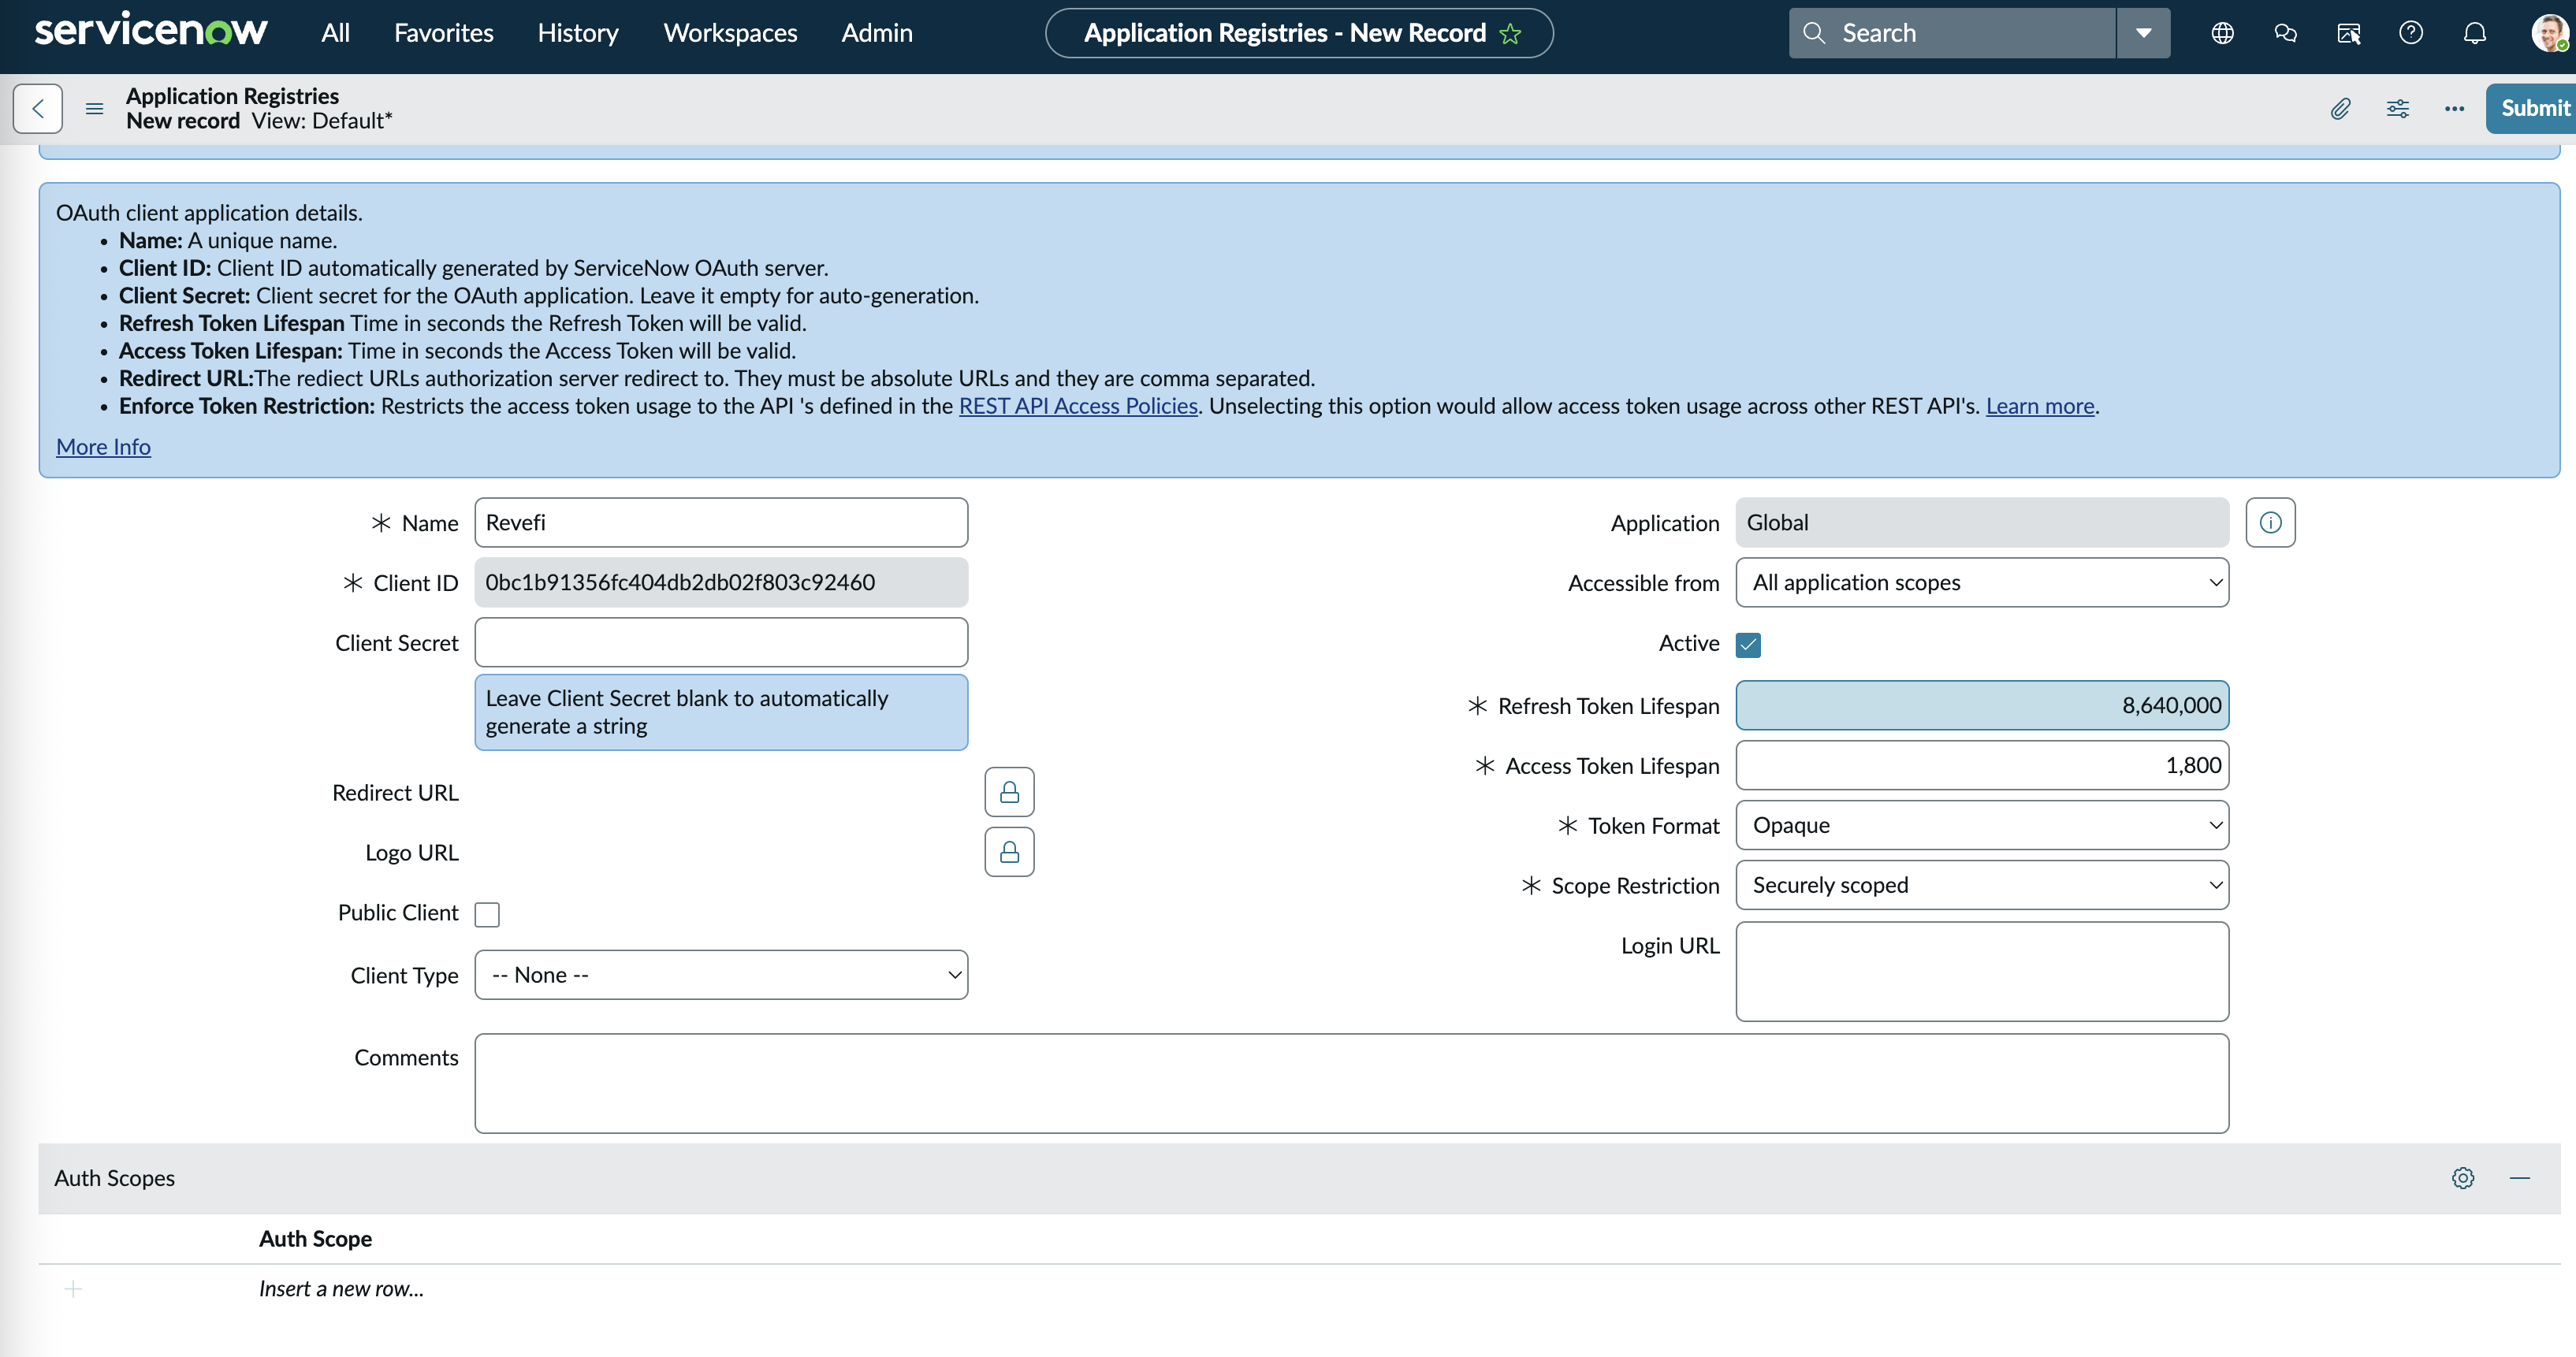
Provide a name for your application, e.g. 'Revefi', and hit 'Submit'. Make note of the generated 'Client ID' and 'Client Secret'
Enable the 'Client Credentials' grant type for OAuth 2.0
-
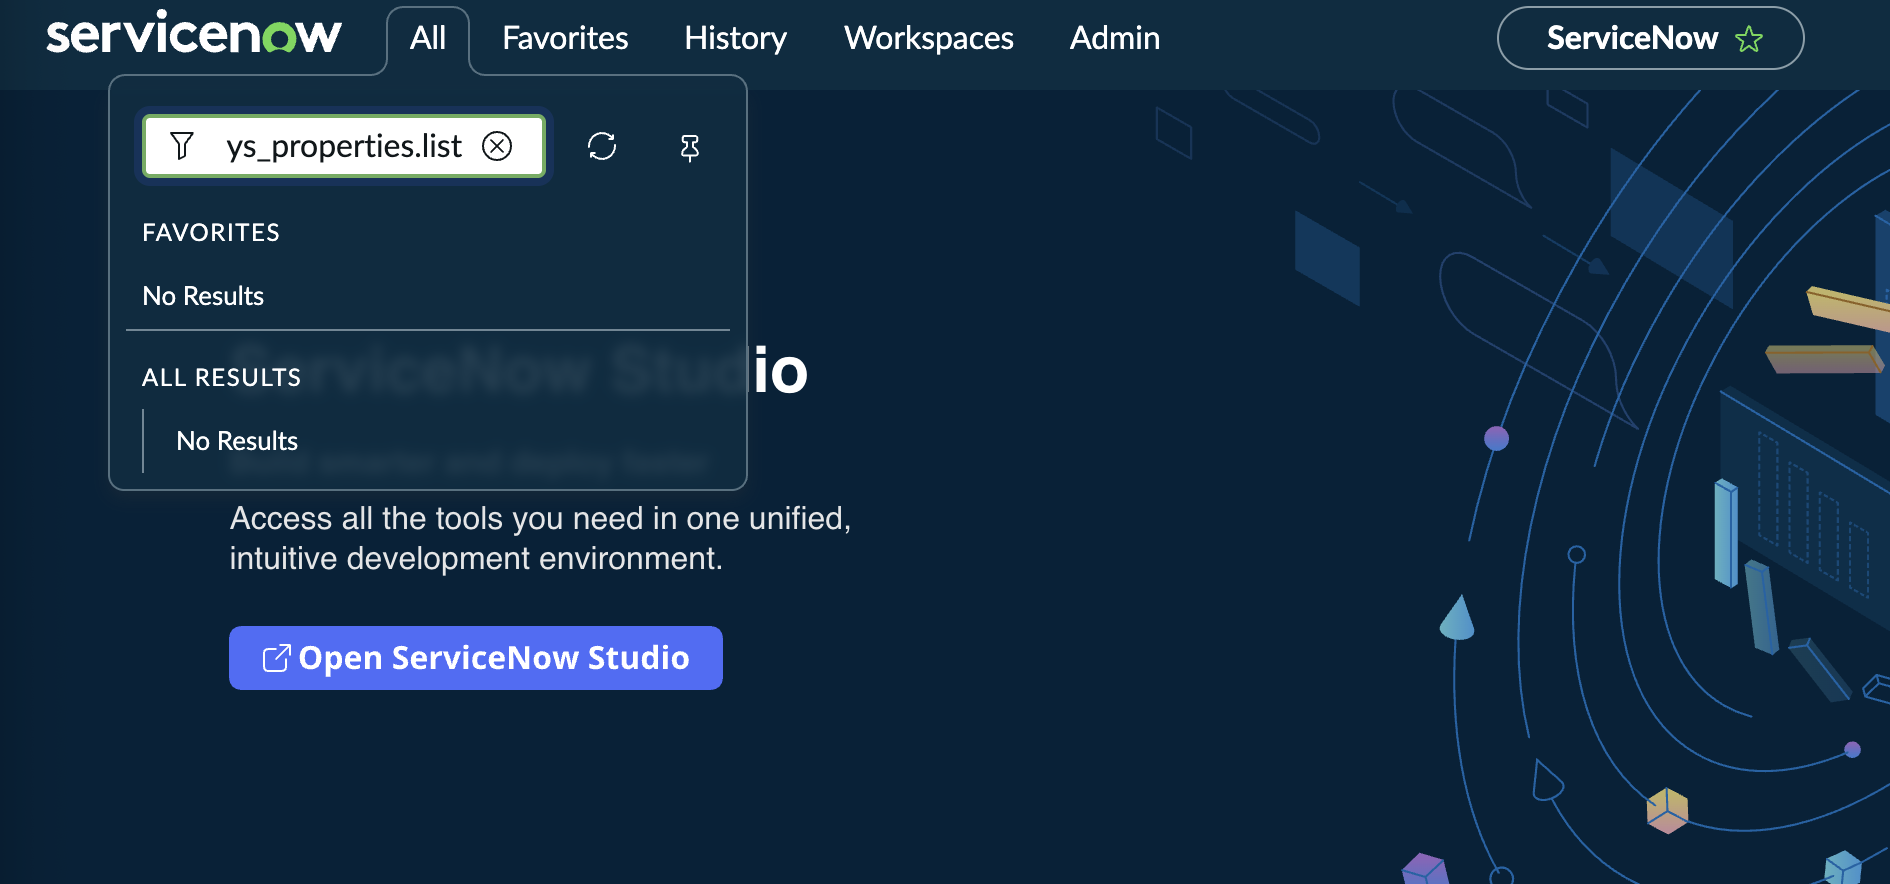
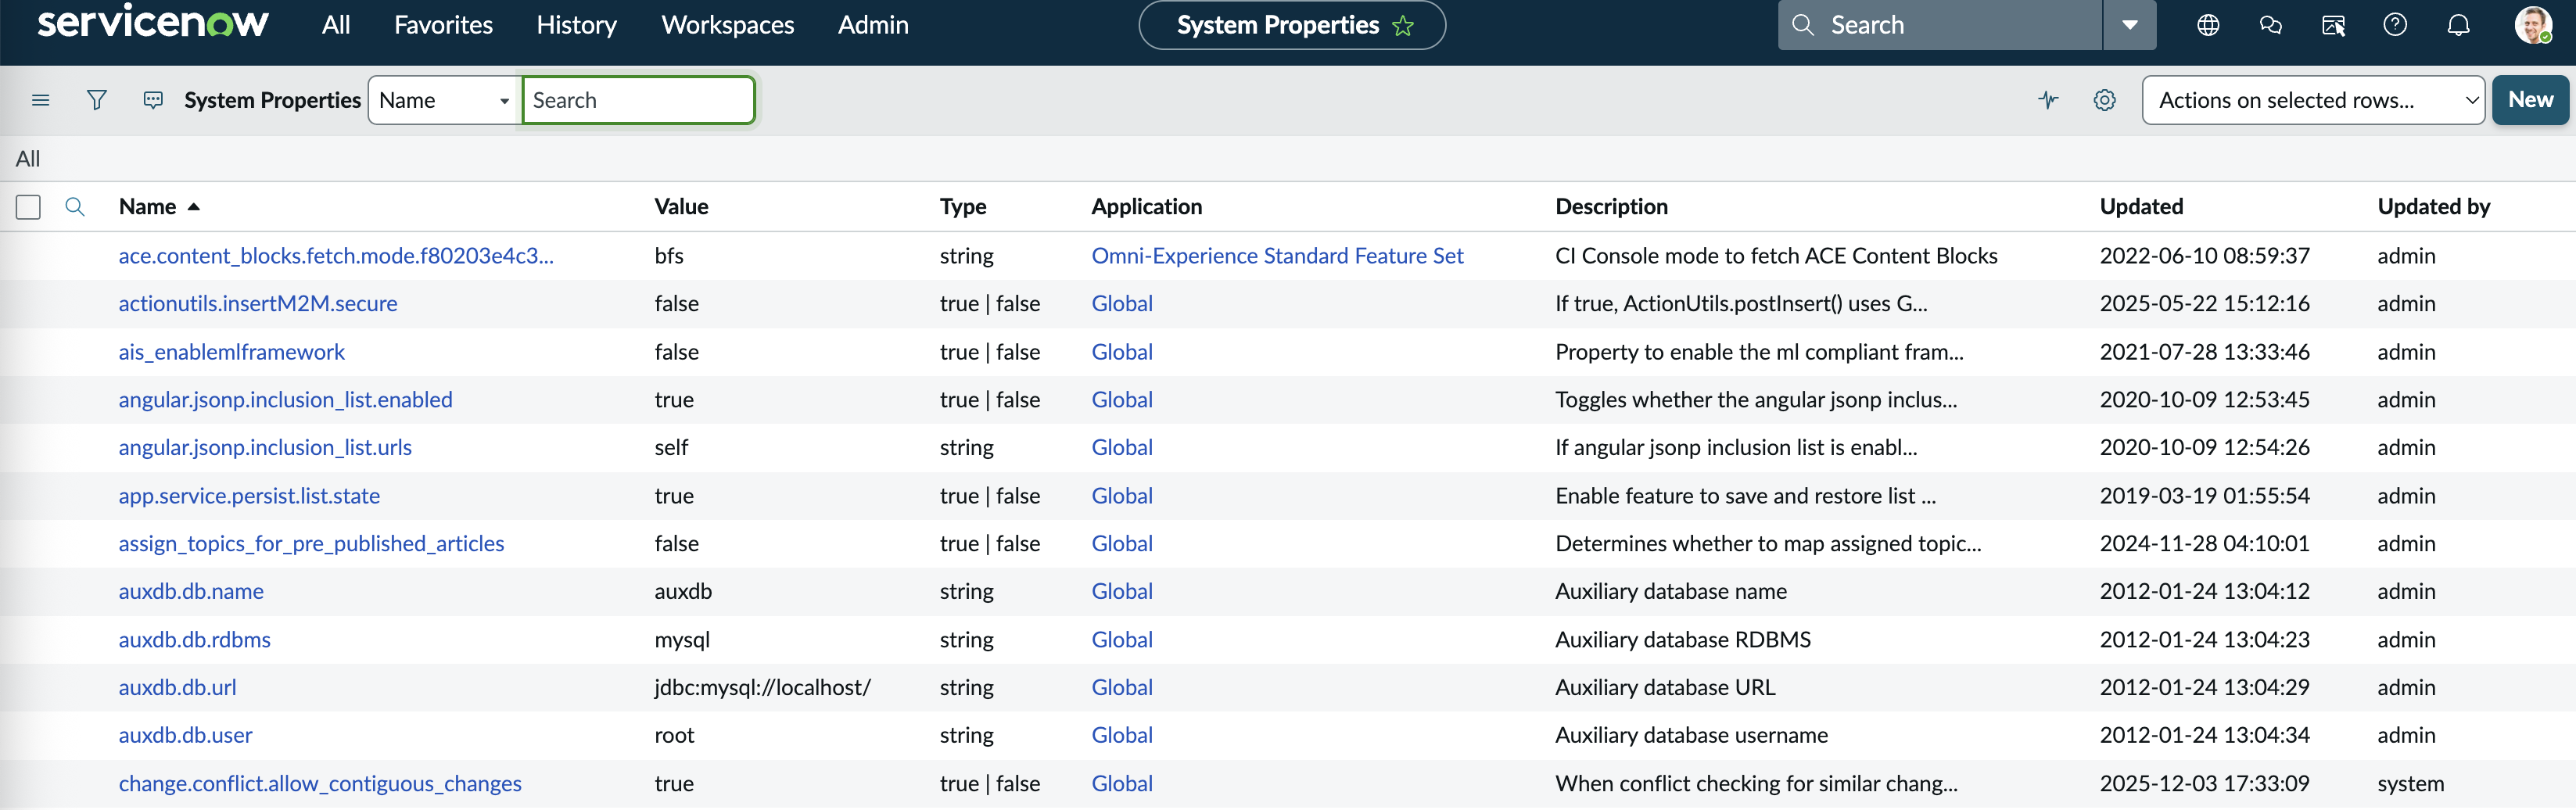
Go to 'sys_properties.list' in the search bar and hit enter
-
Click on the 'New' buttont to create a new system property
-
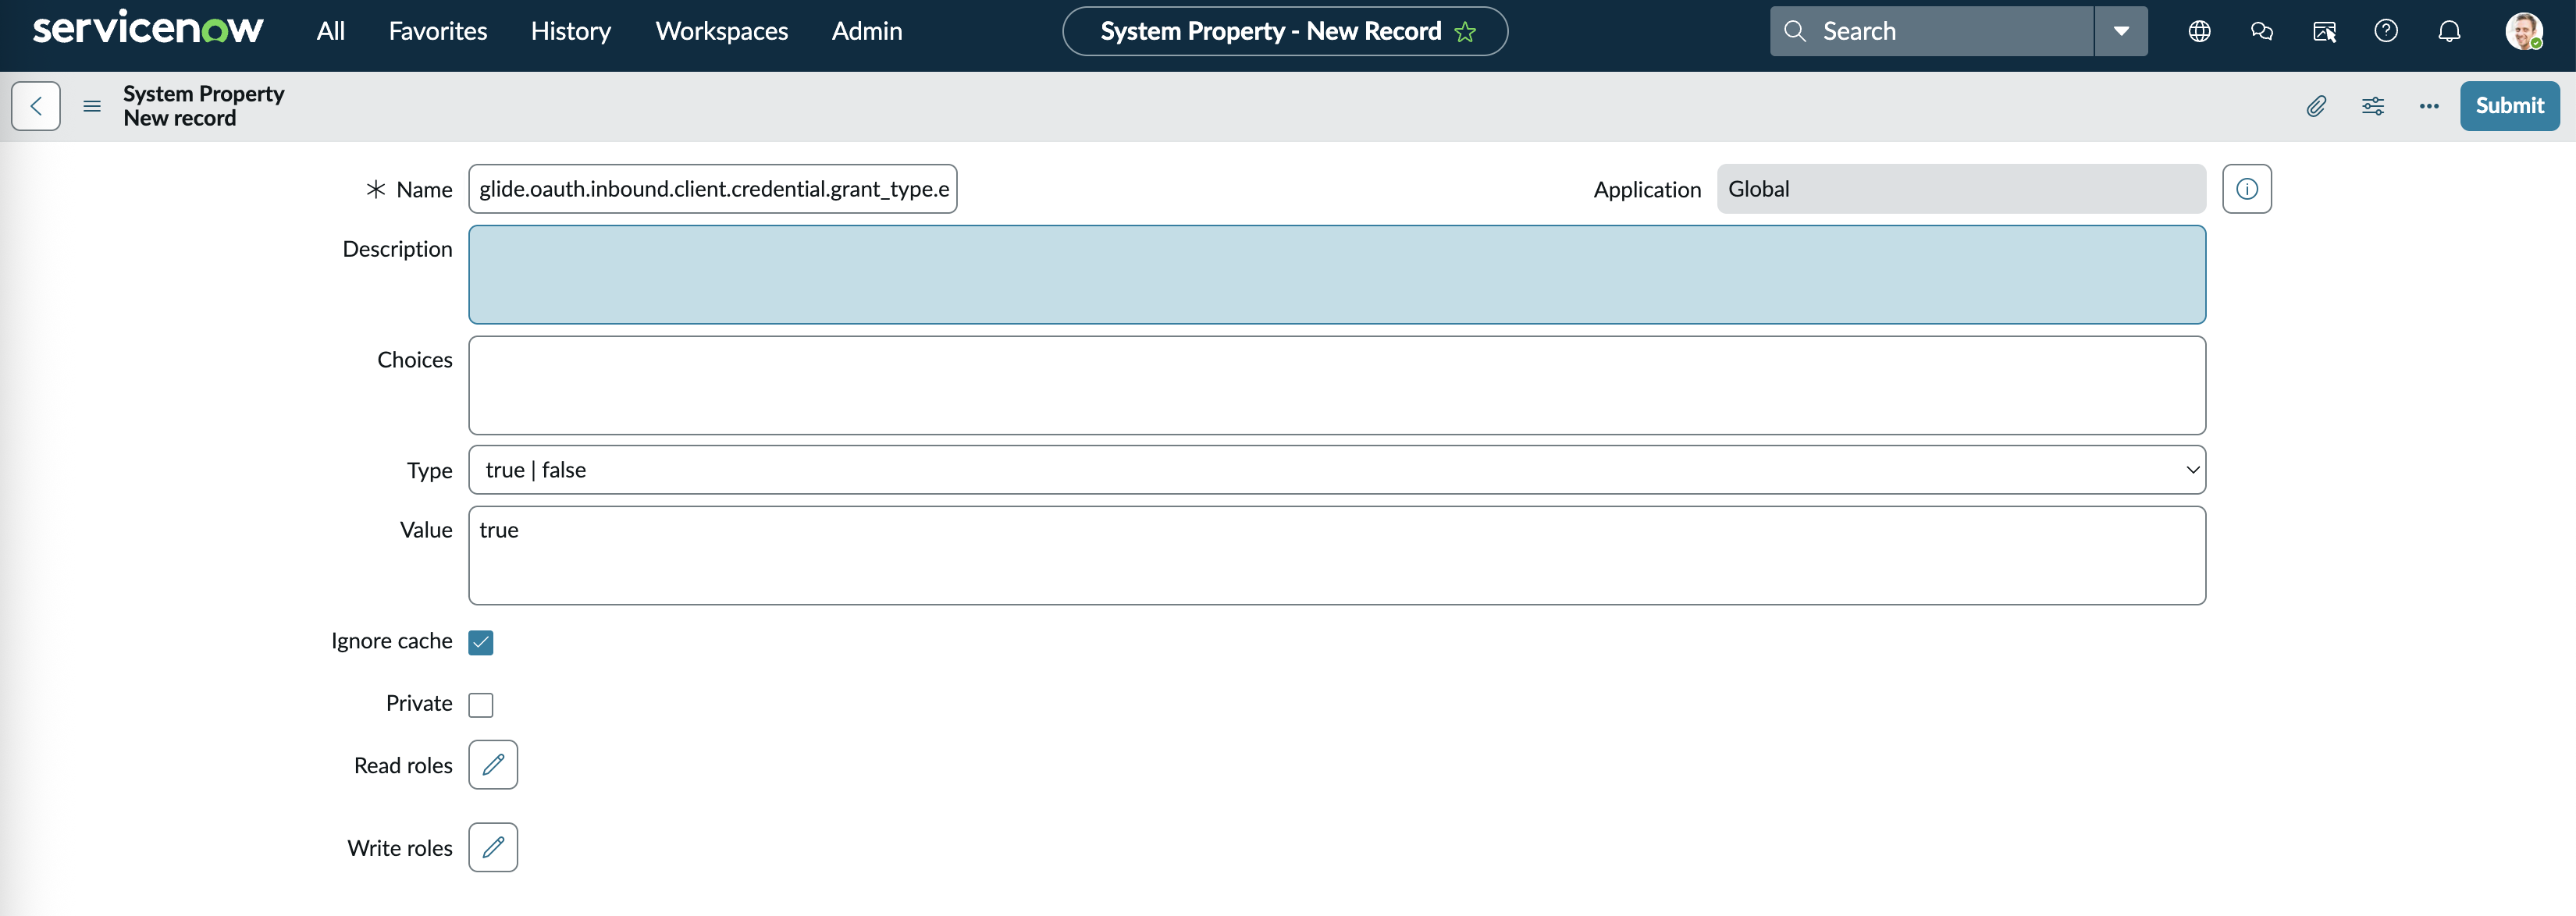
Add a new system property with the name 'glide.oauth.inbound.client.credential.grant_type.enabled' of type 'true | false' and value 'true'
See the ServiceNow docs or this video for more help.
Connect ServiceNow to Revefi
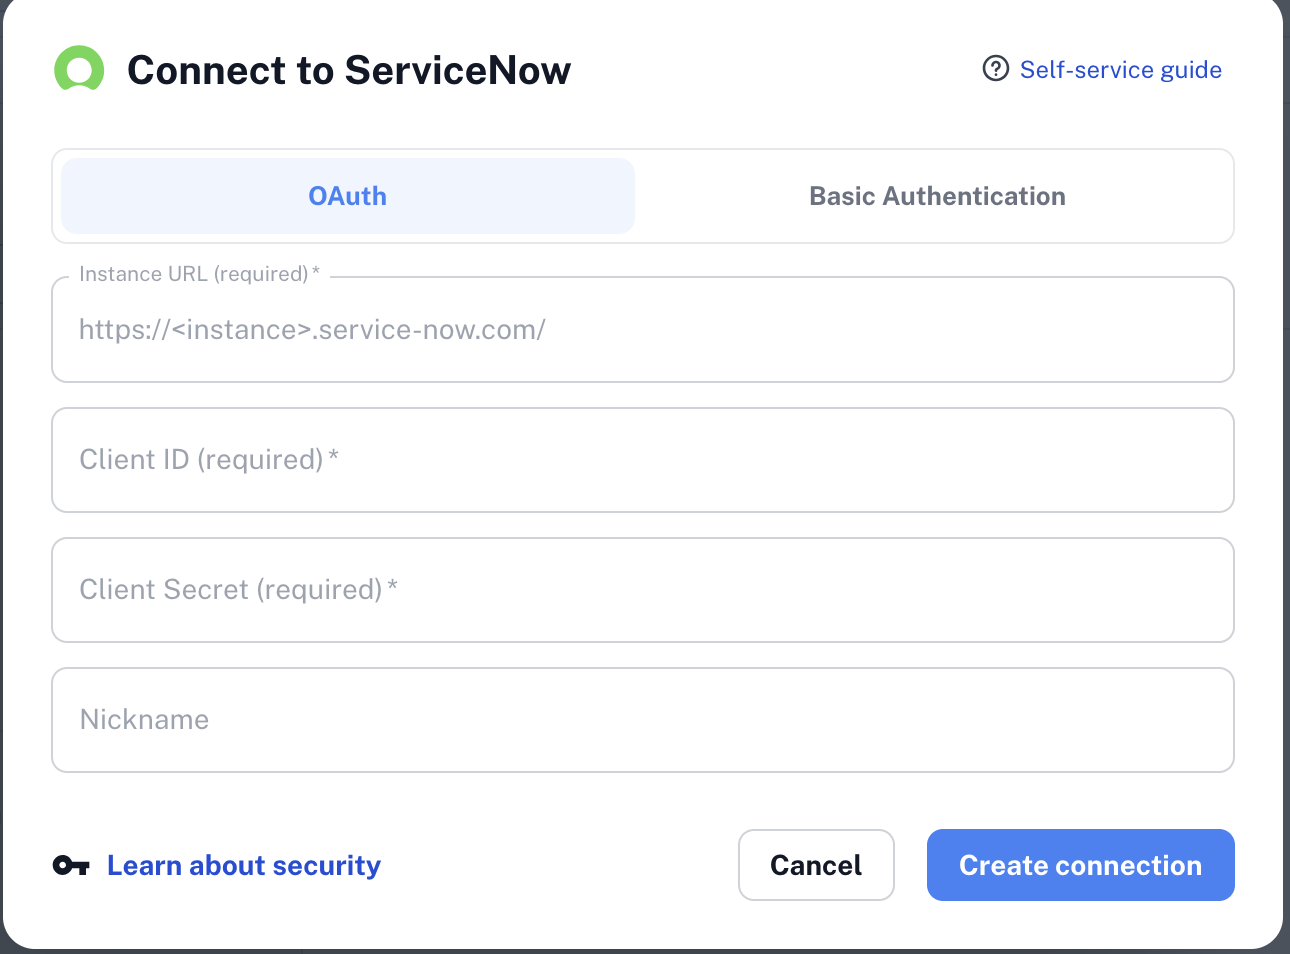
On the Connections page, open the ServiceNow connection dialog and select OAuth tab.
- Instance URL: Your ServiceNow instance URL (e.g.,
https://dev12345.service-now.com) - Client ID: Your OAuth Client ID
- Client Secret: Your OAuth Client Secret
Revefi will automatically handle authentication and token management based on the method you configure.
Create a user in ServiceNow
- Navigate to your ServiceNow instance and go to User Administration > Users using the search bar.
- Click New to create a new user.
- Fill in the required fields:
- User ID: A unique identifier for the user (e.g.,
revefi_user) - First Name / Last Name: A descriptive name (e.g.,
Revefi Integration User) - Password: Set a strong password and make note of it — you will need it when connecting to Revefi
- User ID: A unique identifier for the user (e.g.,
- Uncheck Password needs reset to prevent the account from being locked on first use.
- Click Submit to create the user.
Assign role(s) to the user
- Open the user you just created by navigating to User Administration > Users and clicking on the user.
- Scroll down to the Roles tab at the bottom of the user record.
- Click Edit to open the role assignment panel.
- Search for and add the following roles required for Revefi to create and manage events:
evt_mgmt_integration— grants access to the Event Management module, allowing Revefi to create and update events in ServiceNowsnc_platform_rest_api_access— grants access to the ServiceNow REST API, enabling Revefi to communicate with your instance programmatically

- Click Save to apply the roles.
Connect ServiceNow to Revefi
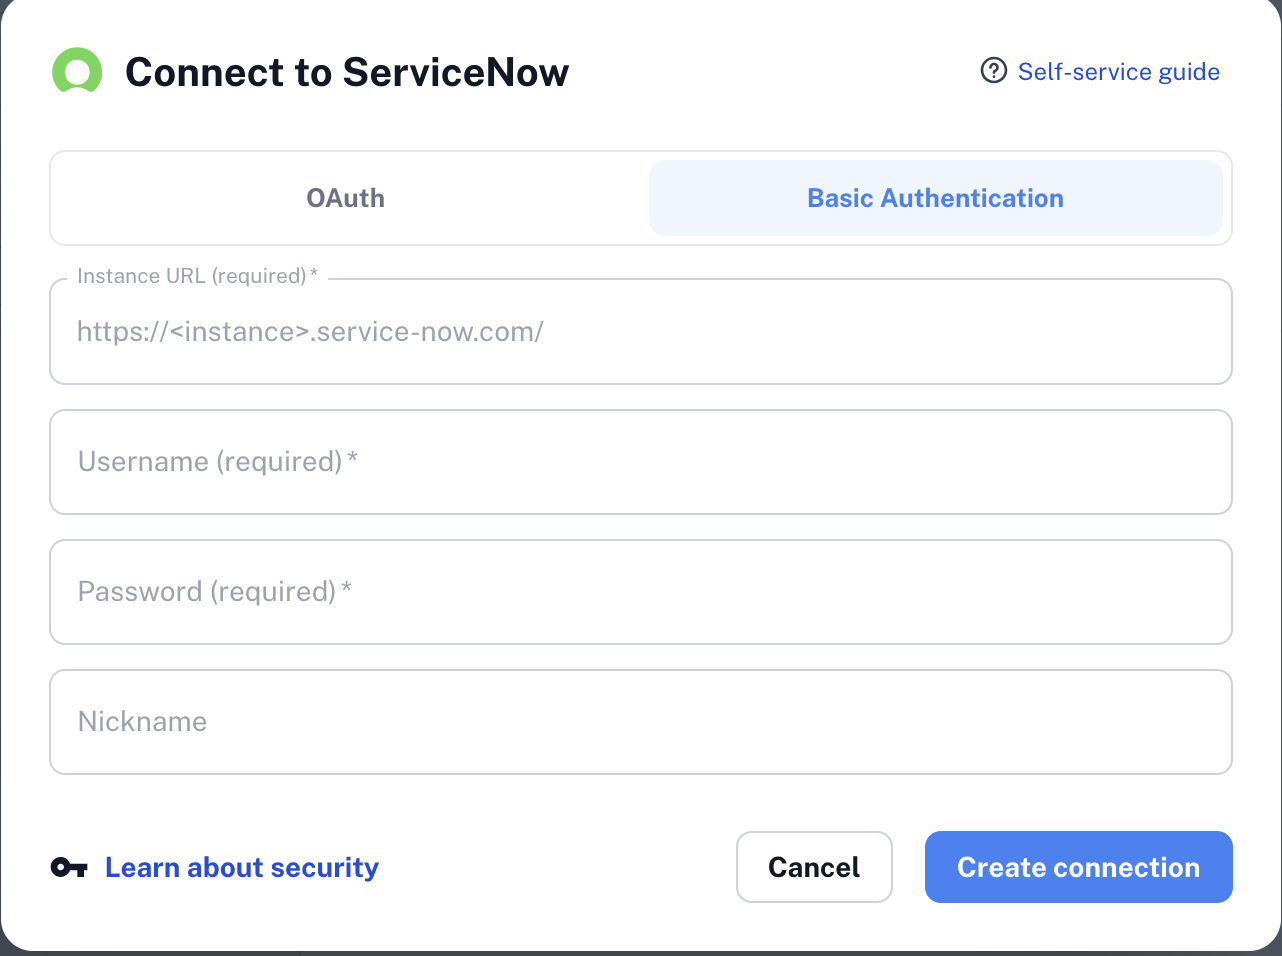
On the Connections page, open the ServiceNow connection dialog and select Basic Authentication tab.
- Instance URL: Your ServiceNow instance URL (e.g.,
https://dev12345.service-now.com) - Username: The username of the ServiceNow user created for Revefi
- Password: The password of the ServiceNow user
Revefi will automatically handle authentication and token management based on the method you configure.
Updated 7 months ago